Saturday, July 26, 2014

How to control bugs naturally, organically

Cucumber beetle-"bad bug" that spreads disease

Saturday, July 26, 2014

There are good bugs and then there are the bugs that eat up your harvest or give your plants diseases.  You have to be extremely careful in applying any insecticides (bug killers) as they will kill off the beneficial insects (like bees) that pollinate your veggies and increase your harvests.  

There are also bugs, wasps and insects that kill the “bad bugs.”  Using insecticides kills all insects and bugs, good and “bad”.  If you use non-chemical methods of control for the first couple of years, your garden will come into balance.  It can be very hard to resist the urge to get out the sprays, but there are other alternatives.

The best approach is to let nature take its course.  If you have bad bugs, the good bugs will quickly follow and provide equilibrium in the garden.  You can also purchase beneficial insects via mail order.  If you go this route, be sure that you will be at home when they are delivered so that you can get them released as quickly as possible.  Good bugs include parasitic wasps, assassin bugs, hover flies, lacewing, praying mantis, and ladybugs among others.
Ladybug eating aphids

You can encourage good bugs by planting flowers either around your vegetable patch or actually with your vegetables.  Marigolds are a “bad bug” deterrent.  I plant these all around my flower garden.

You can also encourage birds to your yard by having trees, shrubs and flowers that attract birds.  Keeping a bird bath with shrubs nearby so the birds can hide in the shrubs is a great way to get birds into your yard.  Birds will be happy to eat as many bugs as they can find!  For those that can, chickens or ducks provide the same service.
Stink bug-"bad bug"

Using a garden hose to dose down the insects can be a good strategy; just make sure that you are not watering a plant’s leaves that are susceptible to fungal diseases such as tomatoes, cucumbers or zucchinis.  

You can also go insect hunting and pull off the insects, larvae and caterpillars and throw them into a bowl with soap and water.  I like the book “Good Bug, Bad Bug”.  It has great pictures of both as well as pictures of them as caterpillars so you have a reference of both.  You want to encourage the good bugs in your garden.

For Japanese beetles, I use an attractor that is quite a distance from the vegetable garden.  They love roses so I go hunting for them on our roses every day.  We also apply Milky Spore to keep the grub population down around the roses so we have fewer adults in the summer.  It may take a couple of years for the spores to multiply in the ground, so don’t give up if the first year you don’t see a huge decrease in Japanese beetles.

For ants, you have to control the aphids.  A recipe for catching the ants and aphids:  2 cups of vinegar, 2 cups of sugar, 2 cups of water in a gallon jug with a lid.  Drill 3 small holes in the lid, large enough for the ants and aphids, but too small for a little bee.  Place in trouble areas.

If you are just overrun with the bad bugs, you can look on OMRI web site to see what the organic insecticides are:  http://www.omri.org/omri-lists  I use Safer Insecticidal Soap and Neem Oil for my indoor plants.

Here are some make your own insect deterrents.  Make sure you test on a few leaves to insure that it won’t adversely affect the plant you are trying to protect.

All purpose spray.  1 garlic bulb, 1 onion, 1 teas dry cayenne pepper, 1 teas liquid soap, 1 quart of water.  Mix water, garlic, pepper and onion together in a food processor, let steep an hour or so, drain through cheesecloth, add liquid soap and you are ready to spray away!

Hot pepper spray.  Good for repelling insects, squirrels, rabbits, and other curious mammals.  1 cup of hot peppers in a quart of water.  Mix in food processor, strain through a cheesecloth and you are ready to use.  Be careful to not get the liquid on your hands and then touch your eyes or mouth.  It will burn.


Tomato-leaf spray.  This is toxic to soft bodied insects like aphids.  It also attracts beneficial wasps.  Take the leaves off the bottom of your tomato plant, 2 cups.  Put in food processor with 1.5 quarts of water.  Let steep overnight, strain out leaves.  Spray on affected leaves, especially the undersides where they like to hide.

Sunday, July 20, 2014

Easy ways to make a new vegetable garden bed

Using a hose to lay out your garden bed


Sunday, July 20, 2014


Making a new garden bed can seem like a monumental, labor intensive task, but it doesn’t have to be. There are several minimal labor ways to make a new bed. My favorite begins with a hose and old newspaper and/or cardboard.

Siting a New Garden

The best place to put a vegetable garden is close to the house where there is good sun, ideally a spot that gets southern exposure. Check out where the sun falls throughout a sunny day to see where the best locations are in your yard. 

Don’t be concerned if your garden spot gets some shade each day. Fruiting vegetables need the most sun, 6-8 hours.
Root vegetables require less and leafy vegetables require the least. Leafy vegetables appreciate getting afternoon shade in the hot days of summer. 

I have a spot on the northeast side of the house that I like to put leafy greens. It gets the morning sun, but the cool afternoon shade.  This allows us to grow lettuce through the summer.

Once you have picked out a spot, you can use a hose to lay out what you want the bed to look like. We then use a spray can of landscaping paint to paint out the edges of the bed.
Brand new mulched garden bed

Transforming Lawn to Garden

The easiest next step is to cut the grass inside your new bed as short as possible. Then lay several layers of newspaper or cardboard over the top of the closely sheared grass and cover with compost then mulch. Now, just let the bed lay until the grass dies. The grass and its roots adds organic matter to the soil as well.  Test the soil before planting to see what nutrients you need to add.  Use a balanced fertilizer when you plant.

Another option is after mowing close to the ground and laying the newspaper/cardboard, dump garden soil over it all, add compost, fertilize and plant immediately. Just be careful to not cut through the newspaper or you will get grass growing in your new garden bed.

We have also used a sod cutter, cutting up the sod in our new bed. Then, turning it upside down, covering with newspaper/cardboard, a couple of inches of compost, mulch, and plant.  This is definitely more work, but you have less chance of having to pull stray grass if you want to plant immediately.

Our garden is a combo of garden beds and containers

Types of Garden Beds

If you don’t need your garden bed to be “pretty”, a quick way to plant is to simply poke holes in bags of garden soil, put the perforated side down, cut open the top side of the bag and plant away. The plastic underneath will keep the grass from growing through. The downside is that your veggie plant roots won’t be able to grow down as well either. But if you don’t have time, this is a good way to get started. You can edge around the bags and removed them the following year, adding compost and have a ready made bed for the following year.

You can also go the raised bed route. There are many do it yourself, pre-cut raised bed kits that you can purchase. Use the same techniques above to make sure the grass won’t grow up through into your veggies. Newspaper and cardboard works great for this. Fill with good soil, compost, an all natural fertilizer and you are ready to plant.

The pros of raised beds is that they warm up quicker in the spring and you control the soil that you are growing in. The cons, the temperature is not as constant as if in the ground and they will need to be watered more often.
Potted eggplant with petunias

You can also opt to have your garden in pots. This is a great way to start small and quickly. It is amazing how many varieties of any veggie you love have been developed to grow in containers.

There are several options to getting your garden bed in place that don’t require a ton of time or hard labor. Now is the time to choose one and get your spring garden growing!


Saturday, July 19, 2014

Growing zucchini and summer squash

Baby zucchini

Saturday, July 25, 2015

Zucchini is a summer squash.  They love heat, fertile soil, and sustained moisture.  You can plant them as soon as all danger of frost is past and they will be producing in just a few short weeks.  They go right through until fall if you keep them picked.  All plants are programmed to reproduce so if you keep the fruits picked, the plant will keep trying to replace it.

Squash originated in Mexico.  There are cave drawings from 8000 to 6500 BC depicting squash.  Squash was grown extensively by Native Americans as part of the “Three Sisters” of squash, corn and beans.
Squash love organic matter.  If you throw a few seeds in your compost pile, you will be rewarded with exuberant vines.

Zucchini is full of nutrition.  It contains antioxidants, carotenes, lutein, folates, potassium, vitamin A, vitamin C, and B vitamins.  For more specific nutritional information, Summer squash nutrition info

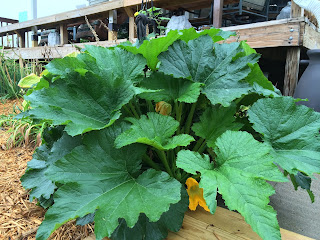
Zucchini bush

Plant when nighttime temps are 55F or warmer.  Add a fertilizer rich in phosphorous a week after transplanting, when flowers first appear and again when fruits begin to form.  They love water, too.  

Zucchini can be easily grown in a container, too.  Look for compact bush types like Bush Baby, Yellow Crookneck, Eight Ball, Cue Ball, Golden Delight, Anton, Patio Star, Giambo, Astia, Raven, Cosmos Hybrid (look for bush types versus vining types).  If growing in a pot, keep well watered and don’t let dry out.  

Don’t panic when the first blooms fall off without producing any fruits.  There are male and female flowers.  If yours falls off, it was likely a poor guy that withered without the love of a gal.  There can also be some false starts with malformed fruits.  Don’t worry, the plant will put on more blooms and you will be on your way to zucchini overload before you know it!

Give zucchini a mid summer side dressing of fertilizer or compost if planted in the ground.  Fertilize every couple of weeks with a liquid fertilizer if in a pot.

If you allow the fruit to get too big, the skin gets tough and the seeds hard.  Optimum length is no longer than 6 inches for the juiciest fruit and the smallest seeds.  We just picked 2 that were more like a foot long and they were still delicious.  

Our favorite preparation is to slice and grill it.  We slice them lengthwise, brush on olive oil, dust with sea salt, and put them on the grill with whatever we are cooking as the main course.  Grilling or roasting brings out the sweetness in the fruit.  Olive oil does not reach smoke temperatures until 350-400F so is still a good choice when grilling below 325.


If they grow large, you can use them for zucchini bread or cut in half, scoop out the seeds, stuff with a sausage tomato sauce and bake until tender.  

For more ideas on what to do with an abundant zucchini harvest, check out  What to do with all that zucchini?!

There are a couple of pests that you have to worry about with zucchini-the cucumber beetle, the squash bug and squash vine borer.  Cucumber beetle can infect the vine/bush with bacterial wilt.  When you see them, pull them off and drop in soapy water.

In late summer in areas with high humidity, you can get powdery mildew.  This can be treated by spraying with baking soda, copper or fresh whey.  I have found that planting a second plant around the first of July is the best approach.  This plant will be kicking in as the second starts slowing down.

Saturday, July 12, 2014

What's growing in the mid July garden


Saturday, July 12, 2014

July in the USA brings thoughts of Independence Day, fireworks, and ripe tomatoes!  This year, the cherry type tomatoes started ripening mid June, but the bigger tomatoes are still green!  It was a long spring this year, causing the summer veggies to be behind by a few weeks.

I have baby eggplants, zucchini, and the Cayenne, Jalapeño, Pimento, and Ancho pepper plants loaded with baby peppers.  I have harvested cucumbers and banana peppers.  With the cooler spring, many of the lettuce plants that have bolted are still sweet.  The best I have found so far for keeping flavor in hot weather is Red Sails.

I have harvested basil, mint, oregano and tarragon already.  The oregano, cilantro, dill and lavender are all in bloom.  I thin out the plants so they don’t overtake the garden and cut the remaining back by two thirds.  I put the cuttings either in the sun to dry or loosely in paper bags that I let dry in a closet.  Once dry, I strip the leaves from the stems and store in an airtight container or bag out of direct sunlight.

I should get at least one more cutting before fall if I choose.  Or I can just let them bloom.  They look beautiful and the bees love them!

I end up with gallon bags of dried herbs which I mix together and give to friends and family.  I put these herbs in and on many dishes.  It tastes great added to fries, sauces, meats, and dressings.  Here is what has traditionally gone into Herbes de Provence: thyme, marjoram/oregano, rosemary, savory, basil, and tarragon.  Feel free to improvise and use whatever you have from your kitchen garden!

The first round of garlic has been harvested and is getting hardened in the shade outdoors for two weeks and the elephant garlic looks to be ready to harvest next week end.

It is time to fertilize all the pots and garden vegetable plants to keep them growing.  I also fertilize the basil so I can get plenty of pesto frozen for the winter!

The first round of lettuce has gone to seed.  When you see the white fuzzies, they are ready to save.  I just pull the seed heads, break apart, put in a ziplock freezer bag, label with type and date, and store in the refrigerator.  I also re-seeded our Earth boxes with some of the seeds last month.  These are starting to sprout, but aren’t quite ready to transplant.  I had a few small volunteer lettuce plants elsewhere in the garden that I transplanted to the Earth boxes as well.  

The sprouting broccoli I seeded at the beginning of June is finally taking off in the Earthbox.  These were seeds I saved from last year’s plants.  I will transplant at least one to the garden bed.  I use many of these leaves for salads during the hot summer when lettuce is the most challenged.  If you love the taste of broccoli, you will love a salad made with sprouting broccoli leaves!

Our Tuscan kale is big, blue and beautiful!  It is still sweet.  I planted it in the garden as well as pots.  It is doing great in both locations.  I did have some caterpillars munching on the potted kale.  I picked those off by hand last month.
Tuscan kale with petunia

I watered the beds for the first time at the end of June.  It rained a few days this week and is calling for rain again Monday and Tuesday.  Looks like I won’t have to water again for at least a week.  It is important to keep an even water supply to summer veggies.  Uneven watering can cause your tomatoes to crack and your other veggies to put a hold on delivering you fruits and your lettuces to bolt and become bitter tasting.

If you live where it is getting really hot, 90’s during the day and upper 70’s at night, you may also see your tomatoes and peppers production drop.  My peppers on the patio last year got sun scald, too!  If you see sun scald in your potted plants, moving them to where they get some protection from afternoon sun is beneficial.  

I planted some bush green beans this week, too.  Days to harvest was 52.  They will likely come on sooner than that since they were planted late and it is warmer than in the spring.  Mid-August we should have green beans.  Bush beans typically develop quicker than pole beans.  Check the seed packet to see how many days from planting to harvesting the variety you are interested in takes.

Lettuce seeds will not sprout in soil temps in the upper 70’s or higher.  I like to start my lettuce seeds in pots I keep on the north or east side of the house in the shade during the summer.  When they get large enough, I then transplant to a pot or the garden bed.


Summer garden is in full swing!