Sunday, November 29, 2020

December 2020 Edible Garden Planner


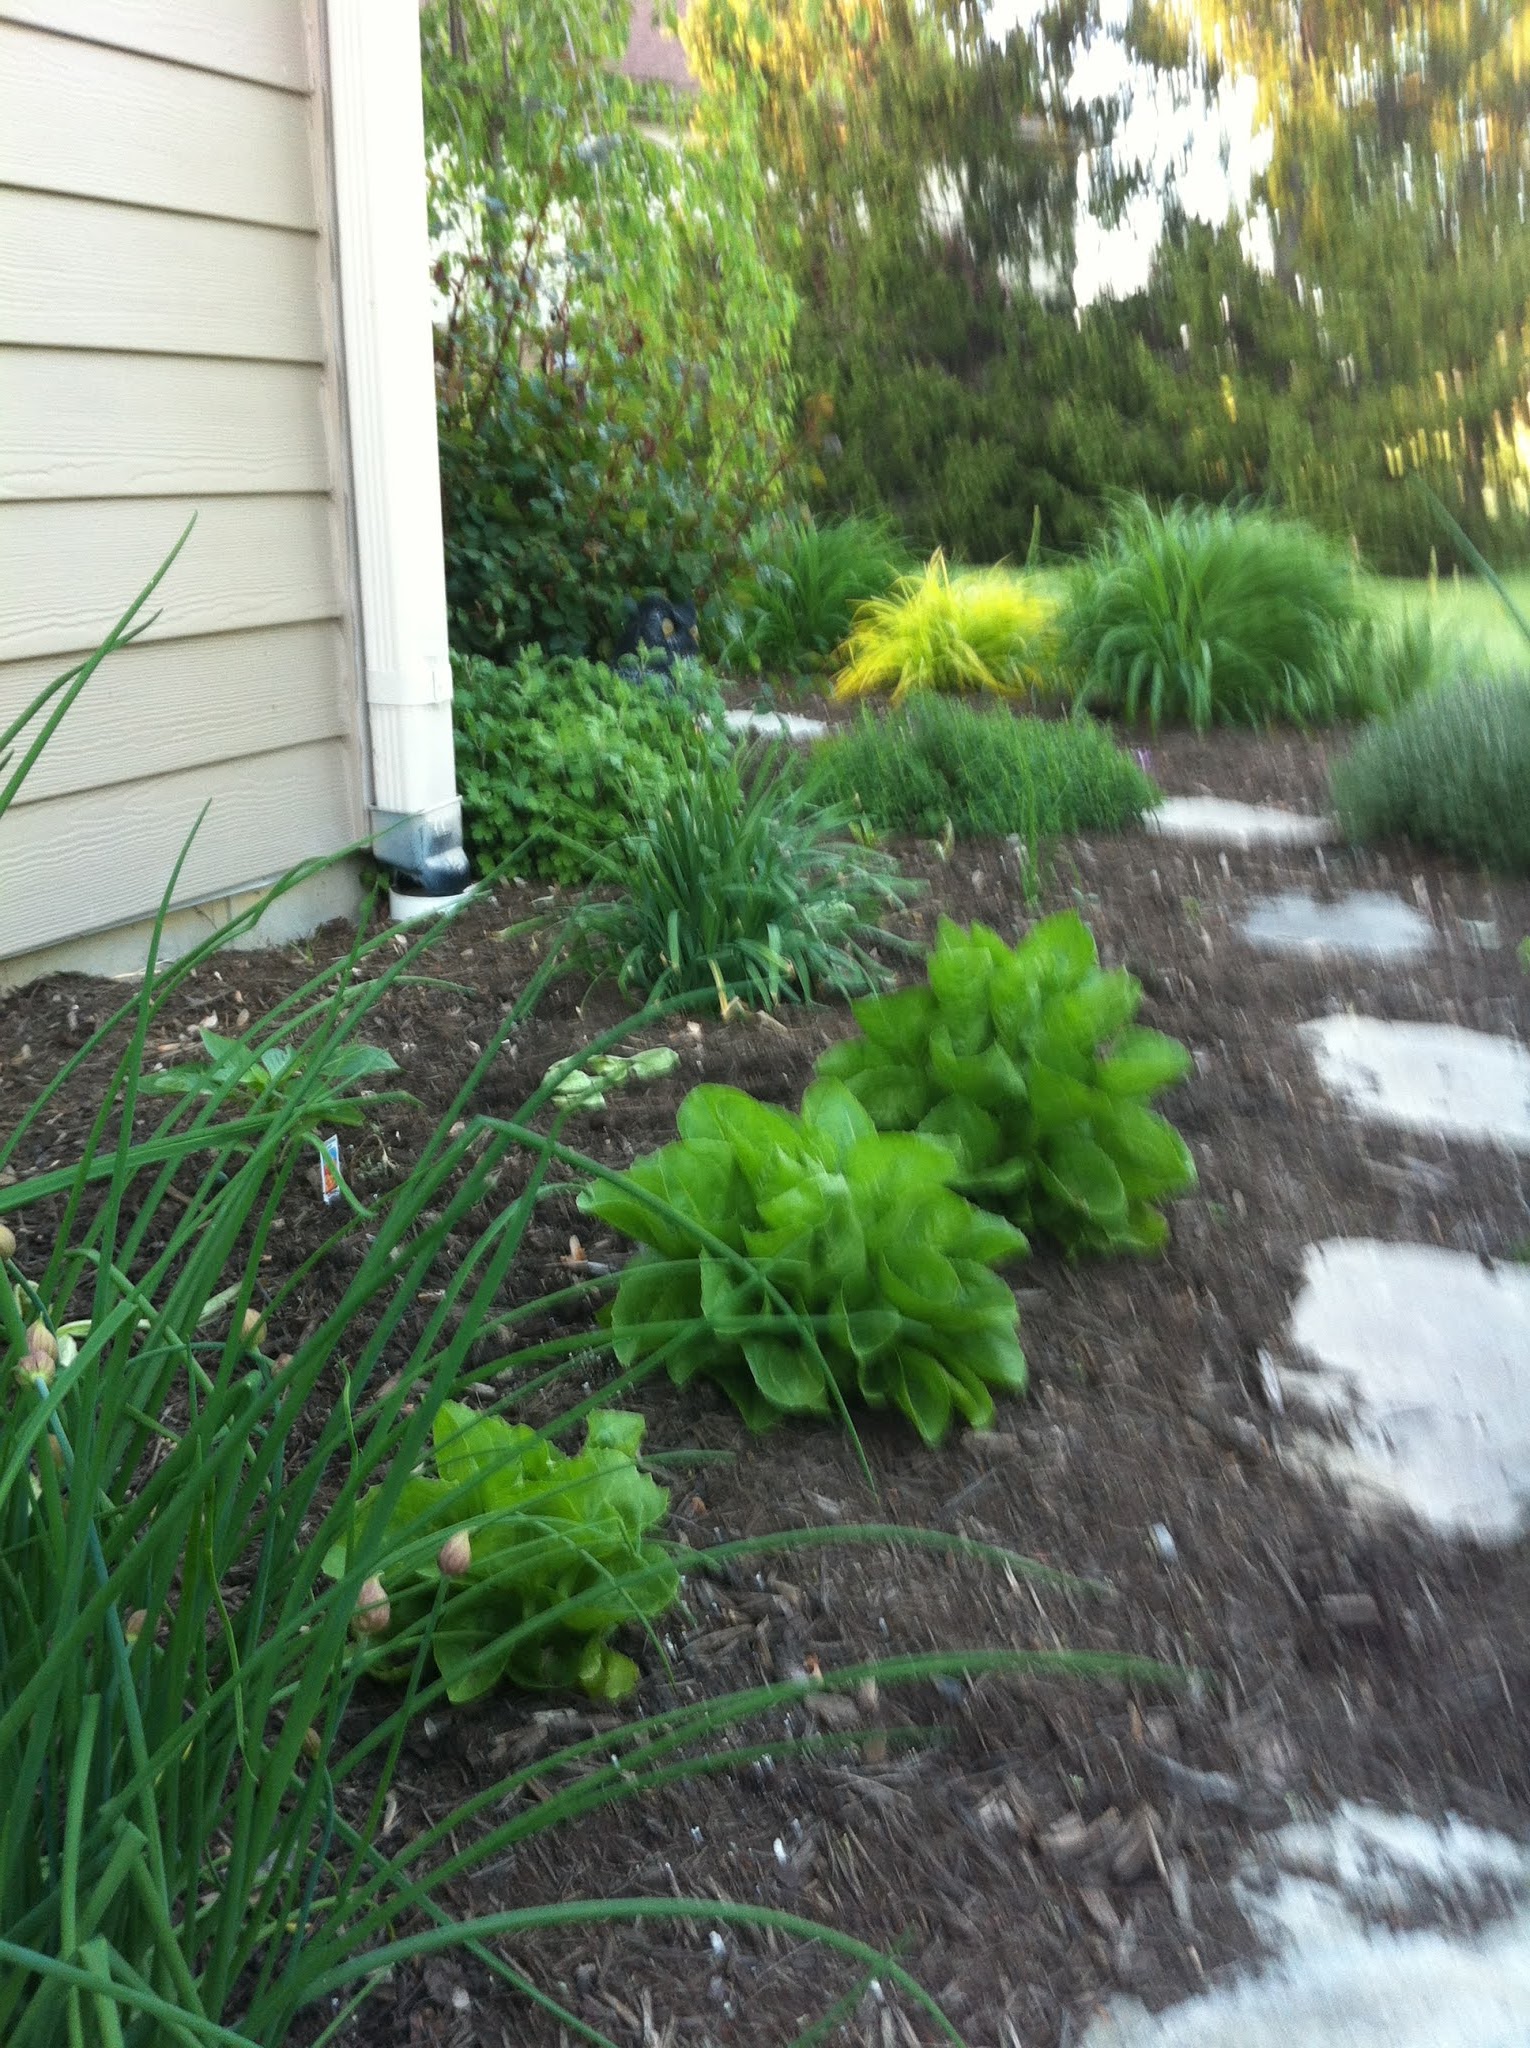
Early December garden; chard in the foreground, herbs in the background
Sunday, November 29, 2020

December is a time of digging in and staying warm.  It may appear that everything is dead outside, but there is still life in the garden.  In the beds, kale, cabbage, salad burnet, sorrel, rosemary, oregano, garlic, onions, lettuce, leeks, chard, dill, celery, sage, carrots, broccoli, spinach are all still green in December.

Fresh herbs are just steps away from the back door.  Most Mediterranean herbs are perennials so you get to enjoy them almost year round.  You can also grow many herbs indoors as well like chives, oregano, rosemary, parsley, chervil, and basil.  Rosemary, basil and bay are good ones to dig up and bring indoors to guarantee survival through the winter.  Just place your potted herbs in a sunny window.  I keep my bay and rosemary in pots and bring into the garage for the winter.  I'm bringing the basil into the house.  The bay trees are getting huge after 4 years in a pot.  
If you are using a greenhouse or row cover, your kale, celery, mustard, lettuce, chard, spinach, cabbage, broccoli, Brussel sprouts, sprouting broccoli are still happy under cover.  They will not grow much until sunlight gets back to 10 hours per day in late January.  Be sure on sunny, warm days to pop the top on your covers or you will scorch your greens.  It can get 50 degrees warmer inside a greenhouse on a sunny day than the actual temperature outside.  
Cultivated dandelion in a pot
All cold crops are at their sweetest during the cold weather.  Frost brings out the sugars in cold crops.  Hardy greens like chard, kale, spinach, mustard greens, cultivated dandelion greens, and collard greens make great salads and are tasty steamed or braised.  You can still sow seeds in December to get a head start on the spring garden.  What to plant in the December edible garden

Make sure if you have any potted veggies to put them on the ground if they are on coasters and move them to a sheltered area on the south side of the house to extend their growing time.  Placing straw bales around them or mounding mulch provides extra protection.  Moving them up against the wall on the south side does double duty-southern exposure gets the most sun and warmth and the wall radiates its warmth.  Pots left exposed create a micro climate that is a zone lower than the ones planted in the ground.  If you are in Zone 7, be sure that plants left in pots are hardy to at least Zone 6 if you want them to come back in the spring.  If they are not, put under cover or bring into the garage for the winter.
Extend the season with protection for plants

Veggies like your favorite tomato, pepper, eggplant, or celery that you potted and moved indoors will continue to produce indoors if provided warmth and enough sunlight.  My Chiptelin pepper is one I bring in every year.  I also bring in moringa tree, lemon grass, citrus, bay and goji berry plants for overwintering in our attached, unheated garage.  We place them in the sunniest spot in the garage and supplement with 4 foot fluorescent grow lights.  

Your indoor and outdoor plants will still need to be fertilized at about half the rate as during the growing season.  A liquid fertilizer every two weeks would be plenty.

Be sure to spray your edible garden beds with deer repellant, sooner rather than later.  The deer and rabbits will be getting hungry and your edible garden will look like a feast to them!  If you keep them from getting into the garden the first time, it is much easier to deter them after the fact.
Chives in front, sage and rosemary in back
The Fresh Produce Buying Local Option
You can check on line to see if you have a farmers market in your area.  Many have farmers markets year round where you can get fresh produce, canned, baked goods, eggs and meats locally grown.  Many that aren't open regularly will have hours before Christmas so you can get fresh, local ingredients for your holiday meal.  A great place for finding what is near you is the on-line resource www.localharvest.org

CSA
CSA stands for Community Supported Agriculture.  It is where you invest in a local farmer in January when they have to purchase their seeds and supplies for the upcoming gardening season.  You then get a weekly share of the farmers harvest typically from May through October.  There are even some winter CSA's now!

Before I started our own edible garden, we joined a CSA.  It was great.  We got lots of super fresh produce, our weekly grocery bill was significantly reduced as our meals were planned around the vegetables, and it was an adventure getting to try new recipes with veggies we had never ate before.   
Eat well, be healthy

A CSA shows you what grows well in your area.  You can find out the varieties you like and when they come into season.  You can even save the seeds from the varieties that you want to grow in your future garden if you partner with an organic CSA that grows open pollinated and heirloom vegetables and fruits.
What do the terms GMO, natural, heirloom, organic, hybrid really mean?

To advertise as “organic” you have to be certified.  Many farmers cannot afford to do this.  Some farmers participate in the "Certified Naturally Grown" program.  This is less expensive than USDA organic, but also relies on inspections by other CNG farmers, non-CNG farmers, extension agents, master gardeners and customers instead of USDA certified agents.  If you are interested in produce grown without pesticides, herbicides or other chemicals, ask the farmer if she uses organic practices.  Go visit them to see the garden for yourself before you commit.  You can also check out reviews on line. 

Where to find a CSA?  Again, a great resource is the web site at www.localharvest,org 

Many sell out by January so don’t delay if you want to join!

Preserving the harvest
It is easy to store winter squash in your pantry to pull out anytime.  We have eaten butternut squash from the garden all the way into June of the following year.  21 no tech storage crops

If you put your garlic in the pantry this summer and some has dried out, make garlic powder.  Just process the dried garlic in a coffee or spice grinder.  Now you have great flavor to add to burgers, sauces or steaks.  Quick tip-make dried garlic into garlic powder   

I take the herbs I had drying in paper bags and remove all leafs.  I store my herbs in quart canning jars.  I mix them all together for a homemade “Herbes de Provence”.  Make your own "Herbes de Provence"  I use it on everything!  It is great in sauces, on meats, in dressings.  

Tarragon, thyme, sage, rosemary and chives
If you threw your extra tomatoes into the freezer and are now thinking it would be nice to have tomato sauce, canning tomato sauce is simple and easy to do.  I can all of last year's tomatoes every fall.  I use Weck’s canning jars and regular canning jars with antique glass lids (for antique glass lids you also need the extra tall antique rings).  Both are all glass so no worries about what is lining the lid.  The Weck's jars are a really pretty tulip shape.  Easy, low tox canning of summer's bounty

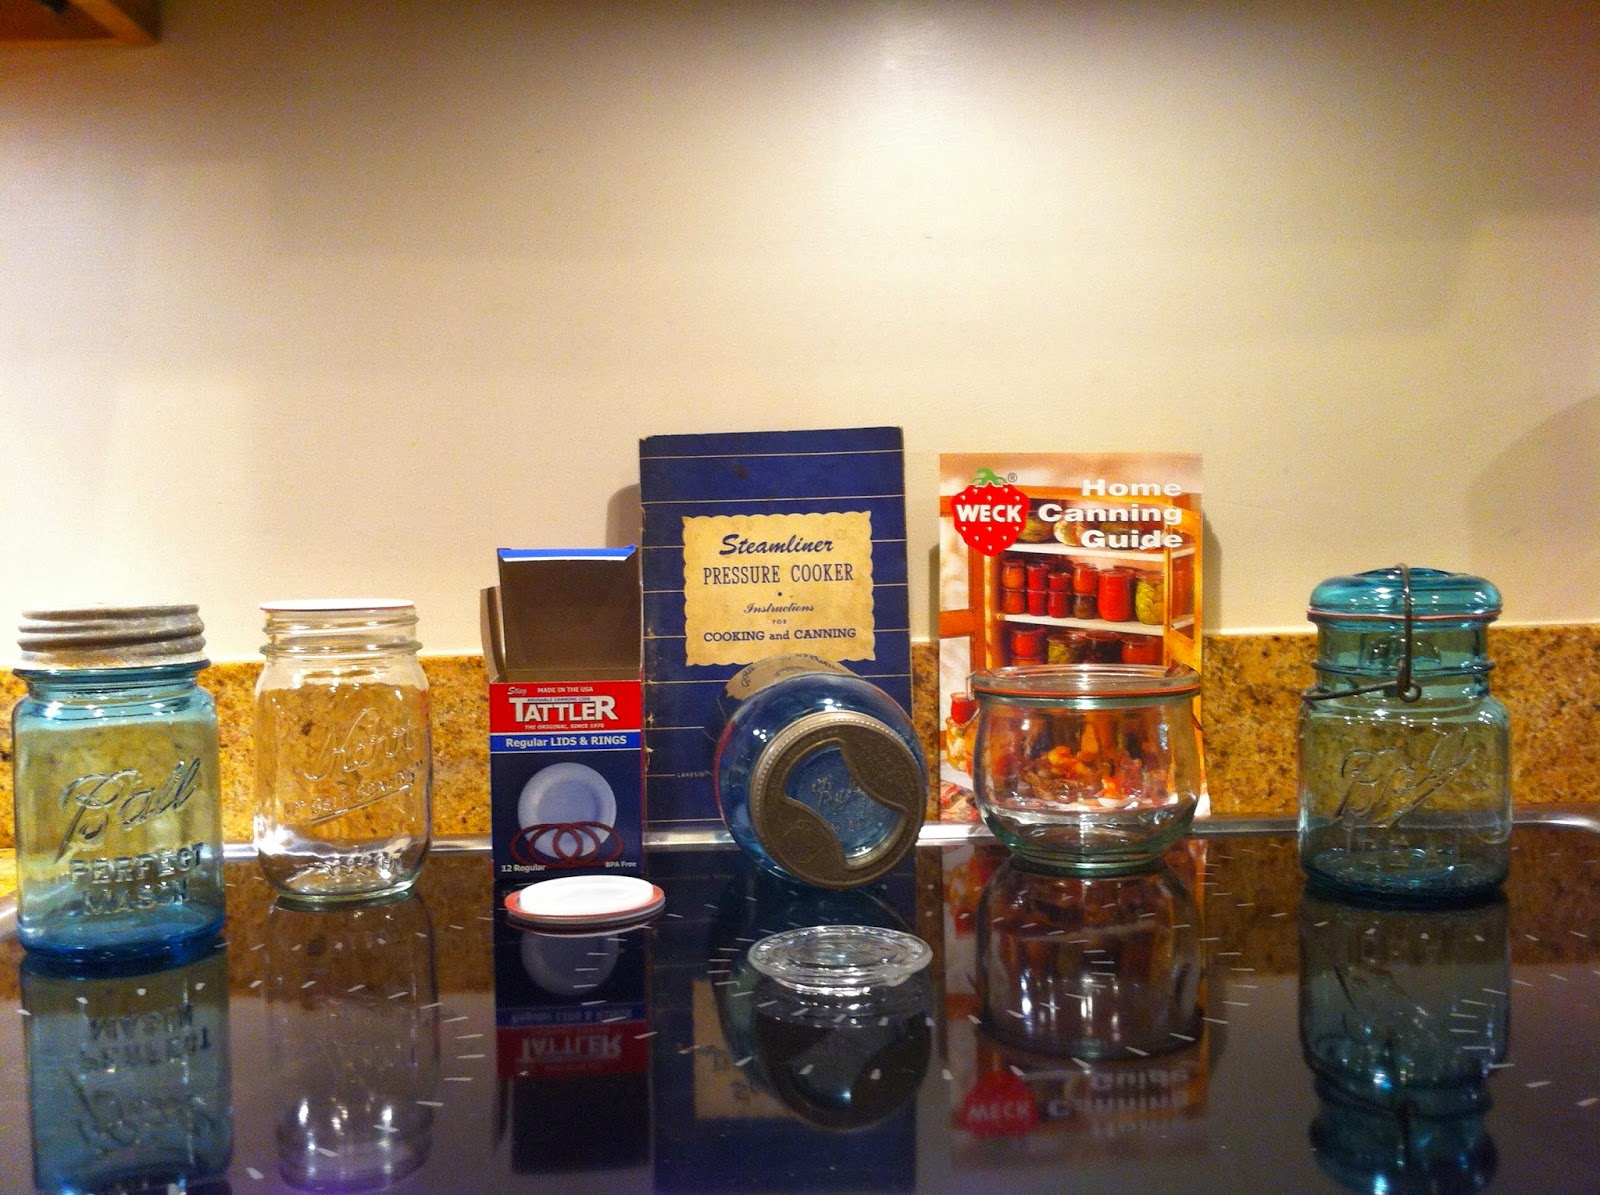
All you need to can tomato sauce is a large pot, canning jars, a funnel, and canning tongs.  A pressure canner is not needed for acidic foods like tomatoes, pickles, jam.  Always follow the recipe as written to insure food safety.  If the food is not acidic enough, it can allow botulism to grow.

I throw the entire tomato (de-stemmed) into the food processor.  Most recipes say to remove the peel and seeds so you don’t have a bitter taste, but I have not noticed any issue with bitterness.

Here is the recipe from Ball’s “Complete Book of Home Preserving” for tomato paste:
9 cups of pureed tomatoes, 1½ cups of chopped sweet bell peppers, 2 bay leaves, 1 teas salt, 1 clove of garlic.

I put it all into a large pot and let simmer until it is the consistency and taste I like, about 2.5 hours.  Remove the bay leaves and garlic.  Boil the jars, lids, and seals as the sauce is close to done.

Add 3 teas of lemon juice to each hot pint jar, fill with the hot tomato sauce to within ½ inch of the top, and seal the lid, following the instructions for the type of jar you are using.  Place all the filled jars in a large pot, insuring they are fully covered with water.  Bring to a boil and process for 45 minutes.  Be sure that the pot is at a steady boil for the entire 45 minutes.  Remove from canner.  Let cool for 24 hours.  Remove the ring and test the seal after the jar is completely cool by gently lifting the jar by the lid.  It should not lift off.  If you are using the antique glass lids, my experience is to just leave the rings on until you are ready to open the jar.  That’s it!  

Other high acid foods you can using a water bath are jams, jellies, condiments, salsas, pickles, and relishes.  I pickle my garlic harvest so I have garlic whenever I need it.  Have garlic any time you need it, just pickle some!  Consult with a canning book for more tips and always follow the recipe exactly as written to insure the right acidity for safe canning.

Winter is time to savor the fresh herbs from the garden along with what you have preserved, browsing for canning ideas, and planning next year's garden.  A potential Christmas meal using what is growing in the garden in December, Jazz up the Christmas feast with herbs from the garden

I have used Christmas break in the past as the time to finalize my garden plan for the spring.  I look back on my notes from last year's edible garden and this year's seed catalogs to decide what new varieties to add to my standbys.  This year, I did it early to be sure I remembered everything well and to be able to place my seed order earlier than usual.

For tips on choosing seed catalogs:   New seed catalogs are here!

Sunday, November 22, 2020

Use your own herbs for your Thanksgiving dinner


Sunday, November 22, 2020

Add a fresh edge to your Thanksgiving dinner by using herbs straight from your own garden.  Herbs can be harvested all the way through the entire winter in most years.  Traditional vegetables used for flavoring the Thanksgiving feast are also harvestable at this time of year, like carrots, onions and celery.

Herbs are easy and care free to grow and almost all of them are perennials.  That means you plant once and they come back year after year.  For more details on growing your own herbs, see my blog here  Start a kitchen herb garden!

Jazzing up the turkey flavor
You can easily make poultry seasoning for your turkey from herbs in your own garden.  Poultry seasoning adds great flavor to, of course, chicken or turkey, but also veggies, fish, casseroles, pasta.

The first commercial poultry seasoning was invented by William G. Bell, a Boston cook, in 1867.  His included sage, marjoram, rosemary, oregano, pepper and ginger.

I like to make my poultry seasoning with dried sage, parsley, thyme, rosemary, and marjoram.  Some add nutmeg, pepper, ginger , onion powder and/or cloves.

Here is my poultry seasoning recipe:
3 Tbl sage
1 Tbl parsley
1 Tbl thyme
1 Tbl marjoram or oregano
1 Tbl rosemary

Insure all spices are crumbled into tiny pieces so they will disperse evenly in your favorite prepared dish.  Combine in a pint jar, shake to mix well.  

You can transfer the amount needed to a kitchen spice jar.  Keep the rest in a cool, dark location.

For any spices, you want to keep them as fresh as possible.  They lose their flavor over time and quicker if exposed to heat/light.

Herbal-powered stuffing
For stuffing, you can gather fresh sage, onions, carrots and celery from the garden even in late November. 

In a bowl, put 8 cups of dried bread cubes and soften with 1 cup of chicken broth (I love using organic “Better than Bouillon” for my stock).  In a skillet, sauté 1 cup of chopped carrots, 1 cup chopped celery, 1/2 cup chopped onions with 1/2 cup of butter.  After browned, add 2 teas fresh sage or poultry seasoning, 1/2 teas salt, 1/8 teas of pepper.  Mix all together and stuff the turkey.

Potager turkey gravy
To make 2 cups of gravy, cook in a sauce pan, 1/2 cup of fresh chopped carrots, 1/2 cup of fresh chopped celery, 1 cup of chopped onions, 3 cloves of peeled and mashed garlic until browned.  Add 1 bay leaf, 3 cups of chicken stock, and giblets and neck from turkey.  Simmer on low uncovered for an hour or so until reduced in about half.  Strain out all solids and combine 1 cup of stock with 1/4 cup of cream and 1/4 cup of flour, whisk until smooth.  Bring remaining stock to boil, add cream mixture, defatted turkey pan drippings if desired, simmer until thickened.

Herbed potato options
There are a few options for snazzing up your mashed potatoes.  For 5 pounds of potatoes, you can add 5 cloves of roasted garlic, 1 cup of buttermilk and 8 ounces of cream cheese.  

Or how about 5 pounds of small potatoes that are cooked until tender, then tossed with 1 cup of butter, 3/4 cup freshly, finely chopped parsley, marjoram, chives and/or thyme.  Add salt and pepper to taste.

Herbal salad dressing
You can keep it simple and flavor a good white wine vinegar with your favorite herb like tarragon for the salad.  Use a mild olive oil so that the flavor of the herb shines through.  Herbal vinegars are easy to make, but you need to make ahead.  Place the herbs in the vinegar and leave in a cool dark place for at least a week.  You can strain out the herbs before using after infused.

Homemade version of Hidden Valley Ranch is easy to make.  Just mix equal amounts of buttermilk, mayonnaise, and sour cream (half cup each).  Then add parsley, dill, garlic, onion (half teas), salt (quarter teas), and pepper (eighth teas) to taste.  If the mayonnaise is too overpowering, I substitute yogurt.   Other home made dressings:  Homemade salad dressing recipes with garden herbs

This is the perfect time for fresh spinach salads.  Spinach, kale, cultivated dandelions and other greens are in season and loving this cool weather.  

Artisanal butter
If you are making an herbal butter to serve, you would want more like 2 tablespoons of herbs to 1/2 cop of butter.  Add the herb that complements the dish you are serving.

You can either serve in a dish, roll it into a log using plastic wrap or form into a shape.  How fun is that!  If you use a form, simply press the softened butter firmly into the form, then place the form into a shallow dish of hot water.  The butter should slide out easily after a little warming.

I make an herb mixture from the herbs I dry from the garden.  It is great on anything!  Make your own "Herbes de Provence"

Saturday, November 21, 2020

Edible gardening basics

Spring edibles in flower bed

Saturday, November 21, 2020

If you are thinking of putting in a vegetable garden next spring, here are a few basics to keep in mind as you start your planning.  

Edible garden basics:
  1. Your zone.  The globe is divided into growing zones.  These growing zones determine what plants can survive year round in your area and length of the gardening season.  Different types of plants thrive in either cool or very warm temperatures and take varying amounts of time to be ready to harvest.
  2. Frost dates.  Even in the same growing zone, you can have different frost dates for spring and fall.  Seed packets will tell you how soon before/after your frost date to start your seeds indoors and outdoors and how many days until harvest from planting date.  Different vegetables seeds germinate at different temperatures.  Ideal soil temperatures for starting your seeds
  3. Location.  The amount of sun that you put your garden in is of critical importance.  Almost all vegetables like to be in full sun for most of the day (at least 6 hours of full sun).  If you have a lot of shade, there are some vegetables that you can grow. Edible shade gardens shine in summer   Don't forget the sunny spots on your patio or deck.  Nowadays you can grow just about any type of vegetable in a pot!  Decorative container gardening for edibles
  4. Size of garden.  The size of your garden will determine what you can grow.  Different vegetables give more food per square foot than others.  You can grow a lot in a small space if you chose the right vegetables to grow.  Just a 6' x 6' space will keep you in fresh produce all season long.  I started by just tucking in edibles in my flower beds to see what grew well and we liked to eat.  Small space French kitchen garden  You can garden year round in small space  The biggest mistake first time gardeners make is putting in too large of a garden.  Start small and add on as you gain confidence.  
  5. What to grow.  Be sure to grow what you like to eat and what will grow well in your zone and garden location.  This winter, keep a log of what produce you are buying at the store.  This will give a good idea of what would be a hit to put in your new garden.  Use this winter to figure out what to grow in the ...
  6. How much to grow.  Start small!  It is easy to get excited about all the wonderful vegetable plants and seeds you can buy these days.  Resist the urge to go crazy!  Here is a basic first garden plan.  What to plant for your first garden
  7. Soil and fertilizing.  Garden bed prep is important.  You can use the fall to get your garden bed ready for planting in the spring.  The best soil has lots of organic matter and a balance of minerals.  Here are some ways to put in a garden bed if you are not going to just use your existing flower beds or pots.  Put in a new garden bed the easy way-really

Sunday, November 15, 2020

Easy, low tox canning of summer's bounty

Tomato sauce in Weck's glass canning jars

Sunday, November 15, 2020

Canning is a great way to preserve your own harvest.  You can also buy organic produce that is on sale from your local grocer or from your local farmers market.  When the produce is in peak season, it is the most healthful and the least expensive of the year.  I freeze all my extra tomatoes, then come fall, I can all the frozen tomatoes from last year. 

When you can, you have to follow the recipe exactly to make sure it is safe to eat.  When canning acidic foods like fruit or tomatoes or anything using vinegar or sugar, you can likely use only a water bath.  All other canning requires a pressure canner to get to high enough temperatures to kill off the bacteria that cause botulism.

Here are some web pages and resources to use:
Mother Earth News “How to Can” app
National center for home food preservation  http://nchfp.uga.edu
USDA’s Complete Guide to Home Canning http://goo.gl/pwrxd
Home Canning  www.homecanning.com 
“Ball Complete Book of Home Preserving” book
“The Complete Book of Small Batch Preserving” book

Many of the lids in today's canning jars contain BPA, a chemical that studies suggest act like estrogen in the body and babies and young children are especially susceptible to its effects.  In 2012, BPA was been removed from baby bottles banned by the FDA, but is still found in many products including conventionally canned foods.  Even those that advertise BPA free can contain other substances that are just as harmful.

In my quest to have toxin free canned goods, I bought a 1946 canning booklet from Amazon.com “Steamliner Pressure Cooker-Instructions for Cooking and Canning” so I could learn how to use the old fashioned canning jars I had bought at antique stores.  It was fun to read, complete with recipes!

Okay, I thought, could I do some canning?  My Granny canned during the summers I spent with her when I was little.  We were growing tomatoes in our little flower/veggie garden and my husband loves those big slice pickles on his burgers. 

My handy Ball canning book revealed that tomatoes, fruits, and pickles are high acid so they do not require a Pressure Canner; only a water bath was needed.  Makes it an inexpensive experiment.

I read that many canning lids also contain BPA.  So, what other options were there?  I found these beautiful glass lids in an antique store.  I also bought the jars with the wire closure.  All I needed now were the rubber seals and some directions!

Old fashioned canning jars, 1946 canning pamphlet, Weck's glass canning jar
I searched the web to see if I could find any instructions on how to use old fashioned canning jars.  No luck.  Then I went to Amazon to see if there were any books on it.  I found a 1946 pamphlet “Steamliner Pressure Cooker-Instructions for Cooking and Canning.”  Success!  It was great fun browsing the pamphlet.  It was also very thorough in its instructions on how to use the old fashioned canning jars.

I went on line and ordered a variety of seals, sticking with ones that were not made in China and were natural rubber.  I wasn’t able to find any that fit well with my cool, old fashioned jars.  I also learned that the glass lids needed very tall rings to seal properly to the modern Mason jars.  The modern rings you can get today were just too short to close properly.

Back to square 1!

Then, I ran across an advertisement for these beautiful glass jar with glass lid made in Germany-Weck’s (it is the second from the right in the pic).  Finally, a non-toxic jar!

Later I discovered a plastic lid that is also BPA free that can be used with modern jars made by Tattler, made in the USA since 1976.  They are a seamless replacement for the metal lids with today's canning jars.

The Weck’s work great.  Easy to use, easy to know that the seal is good, and beautiful to look at.  I highly recommend them.  Since I started using these glass jars, I have seen other European makers of all glass jars and lids available, like Terrina Ermetico and Bormioli Rocco.

All you really need when canning high acid foods is a tall stock pot with lid, tongs, a stainless steel spoon, a towel to put the hot jars on, a cutting board to stage the hot jars, and your canning jars.

Here is a link to my blog on how to make tomato sauce:  
Preserving the tomato harvest

And a link to how to make pickles:
Easy, homemade pickles

Happy canning!

Saturday, November 14, 2020

Outdoor edibles slow down growth in November


Outdoor potted lettuce

Saturday, November 14, 2020

If you have noticed that plants stop growing in the winter, whether indoors or out, you would be right.  It is not just the temperatures that affect this slow down.  It is the amount of sunlight!  

Basically, plants go dormant when receiving less than 10 hours of daylight.  For my latitude, this is from November 21-January 18.  You can look on the weather channel to see when your daylight hits 10 hours.

When planting in the fall for winter crops, you need to plan that they are at full, harvestable size by the time daylight hours are less than 10 hours.  For me, this is November 21st (I add 14 days to the days to harvest on seed packets to be on the safe side for the cooler temps and less daylight than in spring).  They will remain basically this size until the end of January and daylight hours exceed 10 hours again, when they begin regrowing.  If growing in a greenhouse, the warmer temperatures will help plants grow, but at a much slower rate than during longer daylight times.  

The same techniques for protecting spring crops work for your fall and winter gardens.  
Protect your new plants from a late frost
Preparing for a hard freeze

This year, I used portable greenhouse covers over my potted cool season crops and added gallon jugs of water in any empty space.  The water jugs will help to moderate the temperatures inside the greenhouses, keeping them warmer at night.  The number one cause of plant death in a greenhouse is get scalded.  It can easily get up over 100 degrees inside a closed up greenhouse on a sunny day in the 50's.  The greenhouses do have flaps that can be opened when needed.  I keep them open in the fall until the temperatures are pretty steady in the 40's with night time temperatures in the 20's.
Lettuce and greens in January under a portable green house

Growth starts back up at the end of January, for indoor and outdoor plants.  The lettuce, chard, sorrel, cabbage, kale, celery, and herbs that have overwintered will start growing with vigor again after this time with clear days and warmer temperatures.  Cool season crop seeds, like spinach, that were scattered or sown in the fall will begin to sprout; their inner clock just knows when it is time to get going again.

Covering plants with row covers or portable greenhouses can help your plants grow; warmth does make a difference.  Just don’t expect significant growth until we get back to at least 10 hours of sunlight.

Sunday, November 8, 2020

What's happening in the early November edible garden

Lettuce ready to be covered for winter
 

Sunday, November 8, 2020

Well, we had our first hard frost last week in our Zone 6/7 garden.  The temperature got down to 28 degrees F.  It was cold enough to bite the tomatoes, eggplant, dahlias, basil, zinnias, morning glories, and pepper plants.  

I could have used a fabric cover to protect these cold sensitive veggies and they would have been fine for this temperature.  I have gotten a good harvest from all of them so was fine to let them go for the year.  The peppers weren't bit as bad so I was able to harvest the fruits on the plant and bring them in to finish ripening.  The cayenne pepper that was close to the house was not affected at all.  I may bring it in for the winter.  I have had great luck overwintering cayennes.  Gives you a couple months head start on the season in the spring.

When a frost is forecasted, you should harvest all the warm season crop fruit and any basil you want.  A frost will turn basil black and damage not only the leaves, but also the fruits on the plant.

If you had a pepper, eggplant or tomato plant that was just superb, I would consider bringing it inside for the winter.  All are tender perennials and may survive.  Make sure to give them full sun. 

You could also put the potted tomatoes, eggplant and peppers in a greenhouse and lengthen the season for at least another 4 weeks. 

The cold season crops like lettuce, cabbage, kale, broccoli, cultivated dandelions, spinach, onions, mustard, sorrel are very happy.  The celery is still going strong.  It doesn’t seem to be affected by heat or cold.  We harvest from it year round.  You can bring it into the garage or keep in a greenhouse and harvest from it all winter.

The rest of the herbs are doing very well-thyme, oregano, chives, dill, rosemary, sage, bay, parsley, mint, tarragon.  I will bring the stevia plant in for the winter.  I will also try bringing in Malabar spinach and New Zealand spinach.  I haven't tried to overwinter these, so it will be an experiment.

I transplanted the hardy greens from the garden I want to harvest over the winter into the pots that I keep under a portable greenhouse for eating during the fall and winter months.  I also moved pots of Rat's Tail radish on over.

I have broccoli, cabbage and cauliflower in the garden bed.  They should do well there without cover into winter.  I do have a couple of portable row covers I may try to extend the season further if they haven't fully matured for harvesting by mid-December.

Time to settle in for cooler weather!   

Saturday, November 7, 2020

Winter edible garden

Winter onions
Saturday, November 7, 2020

The winter garden can be a productive one.  There are three tricks to having garden fresh produce all winter.  One is to plant early enough to be at full size by first of November.  The second is to leverage protection like row covers and portable greenhouses.  The third is to choose the right varieties that are winter hardy. 

If your want to ramp up the flavor and nutrient value of your winter meals, consider planting the season’s last garden using quick-growing crops such as greens, cabbage and radishes. It’s not too late to get plants in the ground for fall and winter harvests as late as early October and definitely if you live where winters are mild. In fact, many plants get sweeter in chilly weather, and some hardy plants can be pulled right out of the snow for fresh eating like carrots and onions.

If the thought of fresh-picked salads and hearty, nutritious sautéed greens on your winter table appeals to you, use the information here to sow your winter garden and enjoy homegrown flavor, nutritious produce this winter.

If you haven’t already started seeds for transplanting, seek out transplants from garden centers.  The ornamental kale and cabbage for sale are not only pretty, but also edible!  Check well-stocked local stores for sturdy, healthy-looking plants. 

Make sure to add a scoop of finished compost to planting holes and organic fertilizer to add nutrients to soil that may be depleted after the summer harvest.  Espoma is readily available at most big box and hardware stores.  For greens type veggies, the general vegetable garden fertilizer is a good choice.

Choose the Right Varieties
In addition to choosing the right plants for cold-weather harvests, you can also increase winter harvests by planting specific varieties. Look for varieties marketed as: winter-hardy, frost tolerant, overwintering, for every season, year-round, remarkably cold hardy, etc. 

Because daylight hours are getting shorter in the fall, you will need to add about 2 weeks to the “Days to Harvest” your seed packet gives as the seed packet dates are based on spring planting.  Plants grow slower in fall because the days are getting shorter instead of longer. 

The list below starts with the produce that will be ready for harvesting the quickest.  You will want to get the slowest growers (at the bottom of this list) in the ground as soon as possible; you may be able to continue sowing seeds of some of the fastest crops into October or beyond.  Those that are planted as transplants can be ready 2-3 weeks sooner than the dates listed below.

If sowing seeds, be sure to keep the soil moist.  Seeds sown in the fall have the same needs as seeds sown in the spring.  Outdoor seed starting tips

17 Varieties for Winter Gardening
Ready for harvest in: 3 to 9 weeks
Can survive frost: Yes
Fall planting notes: For small and fast maturing radishes, broadcast seed directly in beds, or use chicken wire as a guide to space seeds 1 inch apart. Harvest after a few weeks in the ground and before the bulb becomes too hot and fibrous. You can sow seeds once a week for continuous harvests.
2-Turnips  All about turnips
Ready for harvest in: 5 to 10 weeks
Can survive frost: Yes
Fall planting notes: Harvest when roots are mature, but before they become bitter. A “neck” will begin to form when the root has reached maximum size, and quality will decline as the neck elongates.
3-Spinach and other hardy greens   Grow spinach-a super nutritious, easy green
Ready for harvest in: 6 to 7 weeks
Can survive frost: Yes
Fall planting notes: Transplant seedlings about 6 weeks before first frost. Harvest the leaves around the outside of the plant; always leaving 5 leaves on each plant.  This will let you harvest for weeks from the same plants.  Other hardy greens include miner's lettuce, corn salad, sorrel, arugula, salad burnet.
4-Winter hardy greens  Fall and winter greens
Ready for harvest in: 6 to 7 weeks
Can survive frost: Yes
Fall planting notes: Sow seeds directly into the garden or pot.  Harvest the leaves around the outside of the plant; always leaving 5 leaves on each plant.  This will let you harvest for weeks from the same plants.  Winter hardy greens include miner's lettuce, corn salad, sorrel, arugula, salad burnet, cultivated dandelions.
Ready for harvest in: 6 to 12 weeks for leaf lettuce; 11 to 13 weeks for head lettuce
Can survive frost: Yes (depending on variety-try Winter Density, Rouge diver, No Name Red Leaf, Arctic King, Continuity, Salad Bowl, Mottistone to name a few. 
Fall planting notes: Keep transplants indoors until soil cools. Lettuce seeds won't germinate in hot soil temperatures, above 75-80F.  You can also broadcast seeds in cool soil every two weeks for a continuous harvest. I like starting my seeds in a pot in a cool area and then transplant into the garden.  Harvest in early morning for best taste and structure.  
Ready for harvest in: 6 to 8 weeks
Can survive frost: Yes
Fall planting notes: I like getting the transplant pots with several colors; then separate and plant into the garden. Harvest sequentially as leaves mature, 1 to 2 outer stalks per plant; be sure to leave at least 5 significant inner stalks per plant for continuous harvesting.
Ready for harvest in: 7 to 8 weeks
Can survive frost: Yes
Fall planting notes: Plant seedlings deep, leaving 1 to 3 leaves above soil. Harvest as soon as leaves begin to become dull/less green and bulbs stop increasing in size.
Ready for harvest in: 7 to 16 weeks, depending on variety
Can survive frost: Yes (the denser varieties are the most hardy)
Fall planting notes: Plant seedlings deep, leaving 1 to 3 leaves above soil. Harvest at peak size and succulence, before leaves begin to yellow and split, and before plants go to seed.
Ready for harvest in: 6 to 9 weeks
Can survive frost: Yes
Fall planting notes: Plant seedlings deep, leaving 1 to 3 leaves above soil. Harvest sequentially as leaves mature.
Ready for harvest in: 8 to 9 weeks
Can survive frost: Yes
Fall planting notes: Plant seedlings deep, leaving 1 to 3 leaves above soil. Heads grow fast. Harvest before flowering begins. May produce secondary heads. Harvest edible leaves, too — they are even more nutritious than the buds.  I love the leaves in salads.
Ready for harvest in: 8 to 11 weeks
Survive frost: Yes
Fall planting notes: Carrots don't appreciate being transplanted.  Sow directly in the garden or pot.  You can use the thinnings as tasty baby carrots and salad additions. If you do start in a pot to transplant, handle the transplant carefully and make sure its main root is pointing straight down when transplanted.  Harvest mature roots at maximum diameter while they are still sweet. 
Ready for harvest in: 8 to 12 weeks
Survive frost: Light
Fall planting notes: Plant seedlings deep, leaving 1 to 3 leaves above soil. Cauliflower heads often develops in just a few days. Harvest at full size, before it begins to yellow.  Making sure the head is covered by the leaves keeps the head a nice white.
13-Brussels Sprouts  Growing Brussel sprouts
Ready for harvest in: 11 to 13 weeks
Survive frost: Yes
Fall planting notes: Grows best in very fertile soil. Plant seedlings deep, leaving 1 to 3 leaves above soil. When a node begins to grow a bulge out of the stalk to form a sprout, remove the leaf just below it to optimize growth. Harvest when sprouts are at maximum plumpness, before outer leaves become fibrous and sprouts becomes bitter.  Sprouts can be harvested well into winter.  
Ready for harvest in: 10 to 13 weeks
Survive frost: Yes
Fall planting notes: Transplant when seedlings are about 3 inches tall or sow directly in the garden. Choose best seedlings (healthy and vibrant green) to transplant. Harvest outer stalks carefully, leaving 3 to 5 large stalks per plant for continuous harvests.
Ready for harvest in: 12 weeks
Survive frost: Yes
Fall planting notes: Plant seedlings deep, leaving 1 to 3 leaves above soil. Harvest outer leaves to leave inner leaves to continue growing.  In mild climates, collards can be harvested all winter long.  Baby leaves are good in salads, larger leaves are great steamed or cooked.
16-Onions and Shallots  Everything to know about growing onions
Ready for harvest in: Next spring for mature onions, 6 weeks for green onions
Survive frost: Yes
Fall planting notes: Onions, leeks and shallots like loose, rich soil.  Be sure to plant varieties for the length of daylight your zone has in the summer.  It is the number of daylight hours that stimulates the onion to form bulbs.  In our lower Midwest garden, we need intermediate onion types.  Don't be tempted to grow Vidalias in Minnesota; they just won't make bulbs.
17-Overwintering Fava Beans and Peas  Grow a European favorite-the fava or broad bean
Ready for harvest in: 4 weeks-Next spring
Survive frost: Yes
Fall planting notes: Inoculate the seeds to get the nitrogen nodules that support more vigorous growth and nitrogen in the soil.  There are snow peas that are ready to harvest in just 30 days.

Now, don't forget you can harvest many Mediterranean herbs all winter as they are perennials.  Start a kitchen herb garden! 

How Low Can You Go?
Depending on where you live, you may be able to get a decent vegetable harvest even through winter with protection. Several plants will grow well into the snowy months, and a good frost sweetens them by forcing the plants to make more frost-protecting sugars.

Can Survive Hard Freeze
(nighttime temperatures between 25 and 28 degrees): 
• Broccoli
• Brussels sprouts
• Cabbage, regular
• Carrots
• Chard
• Collards
• Fava beans
• Kale
• Kohlrabi
• Lettuce (depending on variety-look for winter hardy)
Onions, leeks, and shallots
• Overwintering peas
• Parsley
• Radishes
• Spinach
• Turnips
• Winter hardy and perennial greens  Perennial veggies in the Midwest garden

Harvest Longer
In fall, promote faster growth by packing plants a bit more tightly than you might normally do. You can extend your growing season by adding thick layers of mulch around plants, or by using season-extending techniques such as row covers. When nights get chilly, protect plants by covering them with a cloth or blanket.  Extend the season with protection for plants

You can use the greens you get not only for salads but also for juices and smoothies.   Grow your own smoothie and juice garden