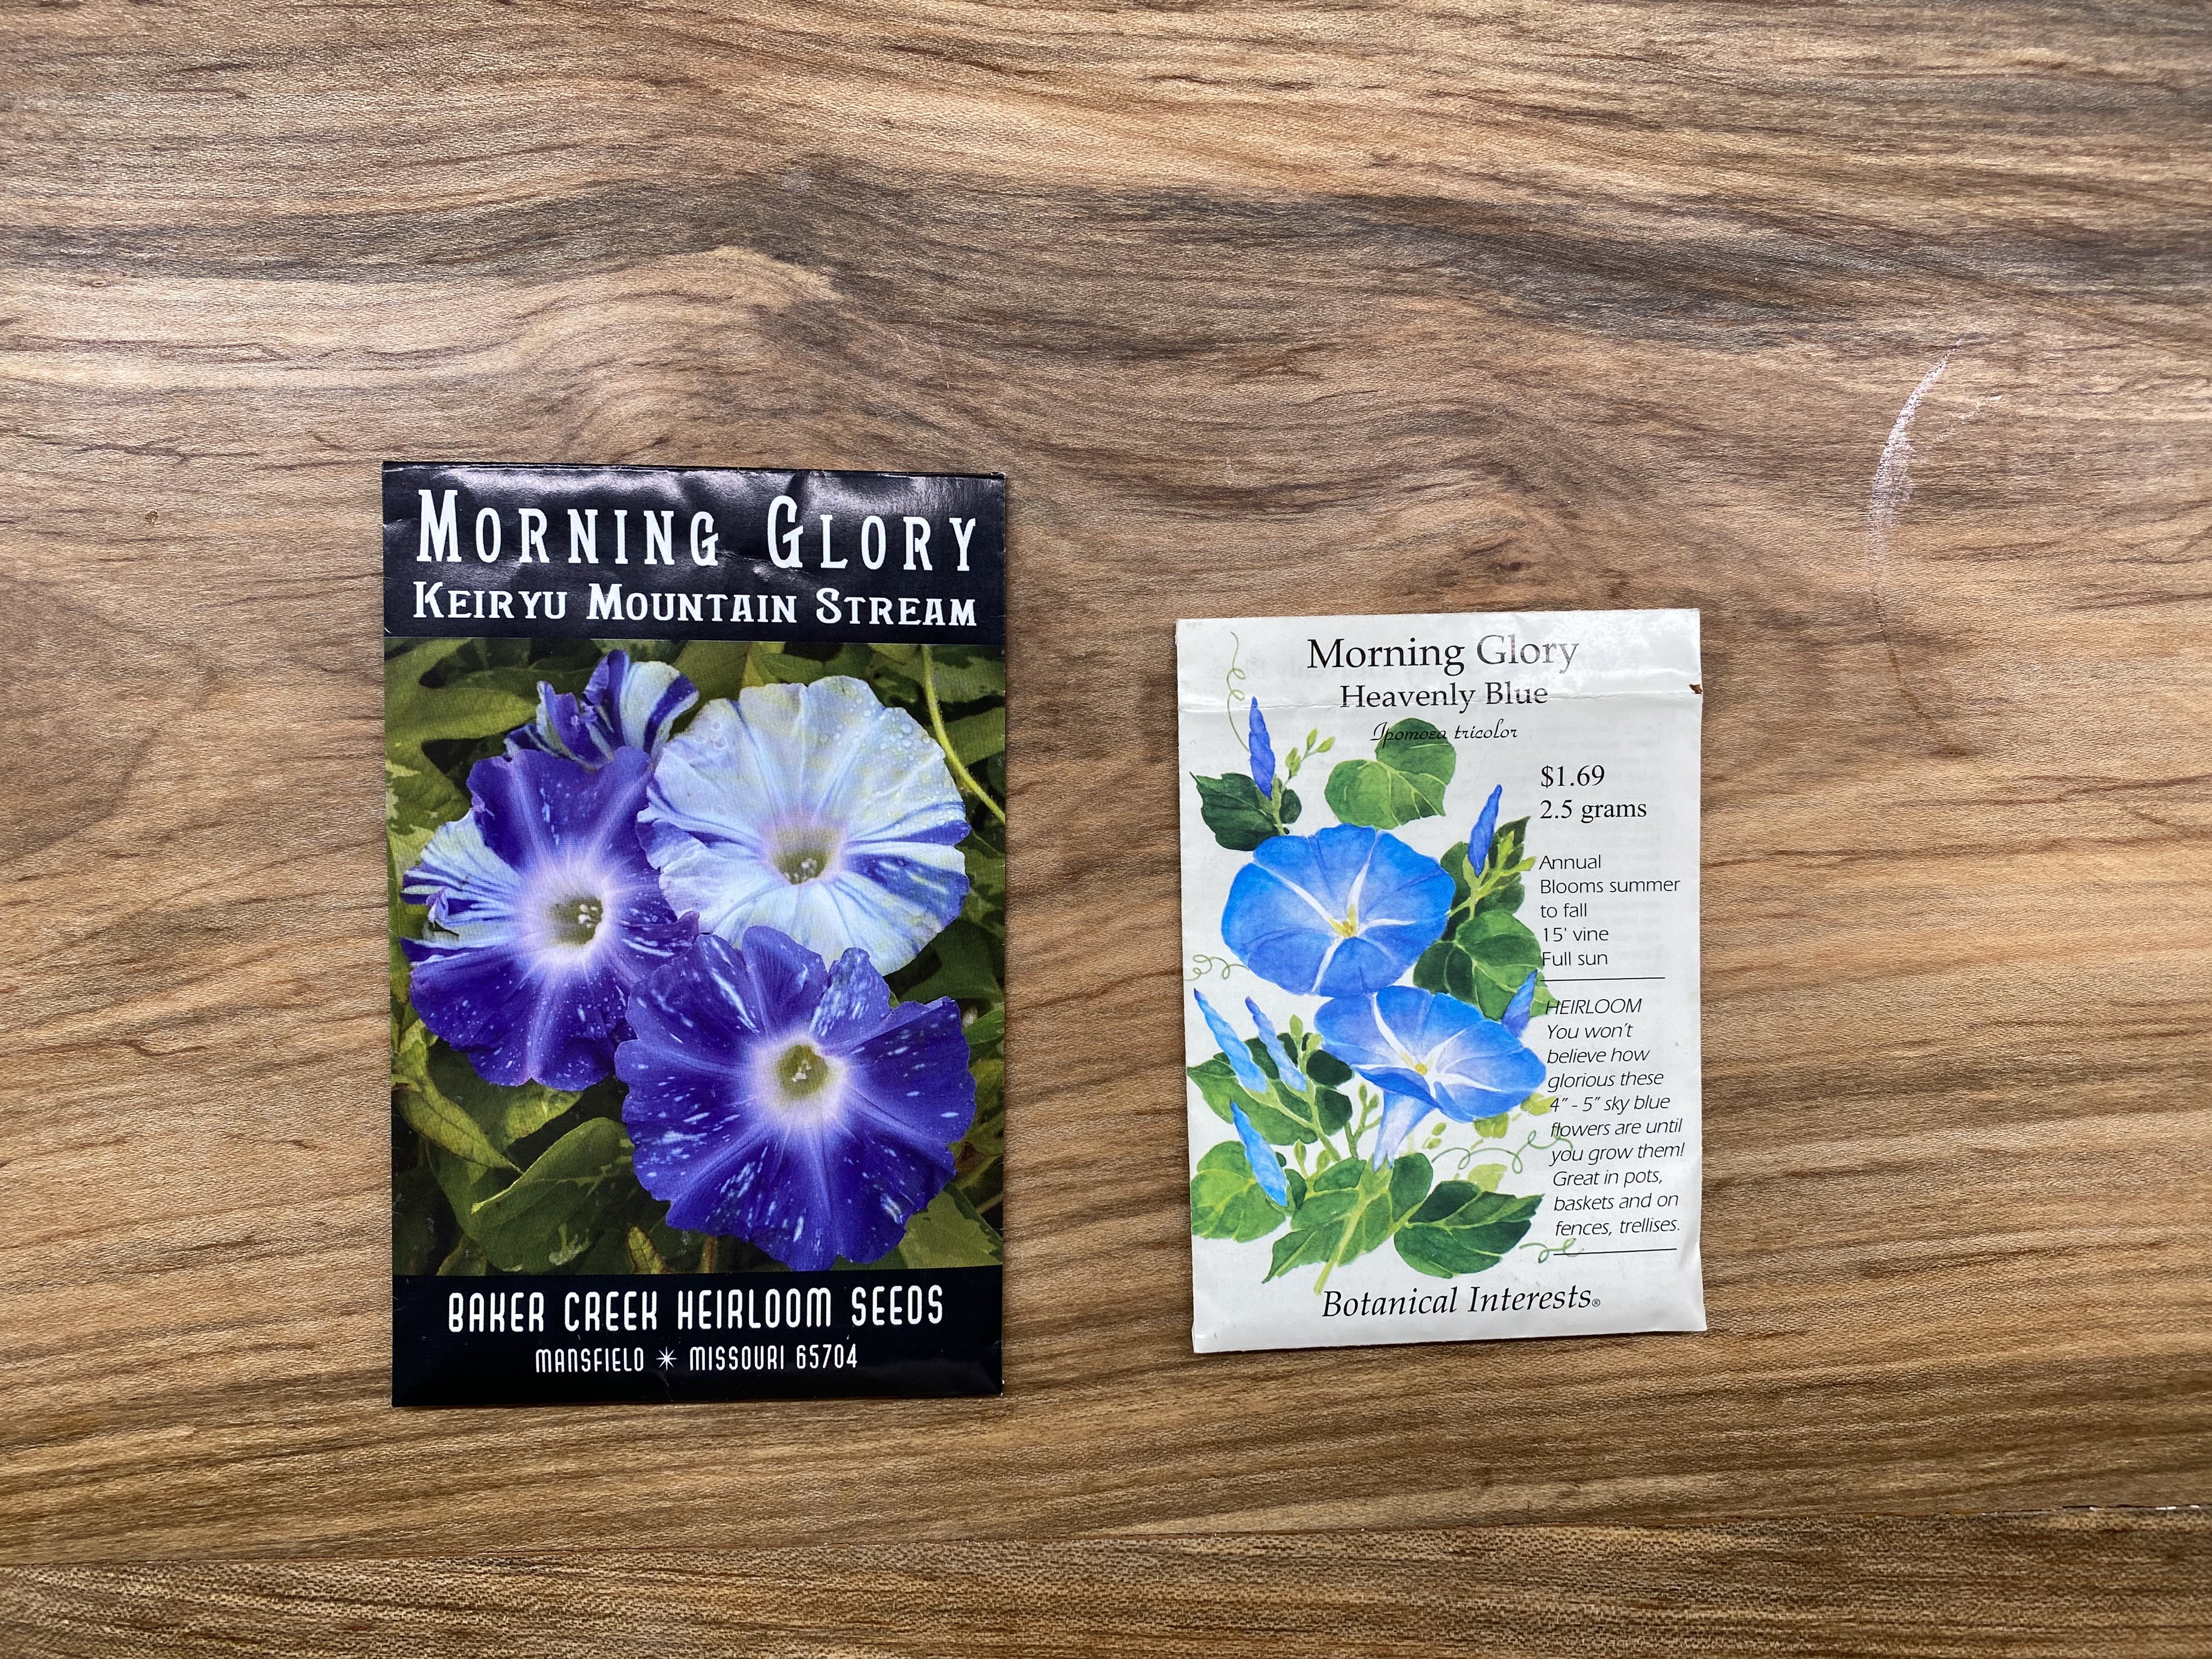
Tuesday, July 8, 2025

Get growing in July!

Onion, oregano, lemon balm and zinnia in July garden
Tuesday, July 8, 2025

You can still plant for summer harvests and July is also the month to start planting for fall harvests.  It may seem crazy to be sowing seeds in July for your fall and winter garden, but it is the time to do so.  Everything you can grow for spring, you can grow for fall.  For winter harvests, look for cold hardy varieties.  

You can plant a second crop of summer veggies and herbs early in the month to keep the harvests strong through October.  Look for varieties that have short "days to harvest" or purchase transplants.  Summer lovers with quick harvest times include basil, beans, corn, tomatoes, and zucchini. 
Summer seedlings
You can also continue succession planting of lettuce.  You may get better germination indoors for lettuce as the temps are a little on the hot side for them this time of year.  

The trick to harvesting all fall and winter is to have your veggies to full size by mid-October.  With the shorter days of late fall and winter, your plants will not grow much after mid-October through mid-February.  This means you start sowing seeds July-August for fall and winter harvests.

The change I make from spring to fall plantings is for spring, I plant those varieties that are heat tolerant.  In the fall, I plant those varieties that are cold tolerant to extend the harvest as long as possible into winter.  Depending on the severity of the winter, many cold tolerant varieties revive in the spring and provide a really early, nice harvest surprise.

Because daylight hours are getting shorter in the fall, you will need to add about 2 weeks to the “Days to Harvest” your seed packet gives as the seed packet dates are based on spring planting.  Plants grow slower in fall because the days are getting shorter instead of longer and steadily cooler.  Frost date look up

Just like in spring, seeds have to be kept moist to sprout.  You can also plant the seeds in peat pots or you can reuse the plastic annual trays you got in the spring.  You can put the plastic trays in a water catch pan, find a shady spot convenient for watering, fill with seed starting mix, sow your seeds and keep moist until sprouted.  When the seedlings get their true leaves on them (second set), they are ready to transplant into the garden or a larger pot.  In hot temperatures, I transplant to a larger pot and let them get to a good size and transplant into the garden bed when it is calling for rain.  I will keep an eye on them after transplanting and water as they need it.  Peat pots require daily watering in summer months because the pots are so porous. 

There are some veggies that the temps are too high outdoors to germinate in our Zone 7, like lettuce.  These you will have to start inside or on the cool side of the house in the shade.  Lettuce has a hard time with germination with soil temps above 70.  

July-Seeds or Transplants
Asian greens (pak choi, tat-soi) Fall and winter greens
Bush beans  Growing beans
Cucumber
Dill
Endive
Escarole
Frisee
Leeks
Lettuce, heat tolerant varieties  Everything you need to know about growing lettuce
Mustard  Mustard greens
Oregano
Parsley
Parsnips
Peas
Rutabagas
Salsify
Scallions
Summer squash

If you don’t want to start seeds for fall harvests, some big box stores and local nurseries have begun to have fall planting veggies.   These typically come into stores in late September.  If none in your area do, there are many mail order seed companies that carry fall bedding plants. 

Sunday, July 6, 2025

You can grow an edible garden in the shade

Vegetable garden in shade
Sunday, July 6, 2025

You may think that your shady yard can't grow any vegetables or herbs.  You may be surprised to learn that you can grow many veggies and herbs in shade.  They will not be as lush or full, but they will produce and some will appreciate the cool shade on hot summer days.

Veggies you can grow in the shade: greens, chard, kale, lettuce, spinach, celery, peas, beans, beets, radishes, turnips, endive, french sorrel, leeks, radicchio, purslane, pac choi, carrots, potatoes, scallions, mustard greens, cultivated dandelions, corn salad, chickweed   
Herbs for shade: mint, chervil, oregano, chives, cilantro, golden marjoram, lemon balm, parsley

I have grown green beans, snow peas, tomatoes, peppers, cucumbers and eggplant in a shady part of the garden that gets direct sun just in the afternoon.  They don't produce heavily, but it is enough for us to eat and put away for winter.  We cut the limbs on the trees up about 10 feet to allow dappled sun to come through in the morning.  Any variety that has been bred for greenhouses are great options for trying in the shadier parts of your yard.

My thyme, mint and Egyptian walking onions thrive in our shady garden bed so don't rule out herbs.

Remember that you will have sun in the spring under deciduous trees until they leaf out and in fall after the leaves have fallen.  Cold crops that do well in cool temperatures of spring and fall include lettuce, kale, broccoli, cabbage, radishes, turnips, peas, beets.  Choose crops that have the shortest time to harvest and plant as early as the seed packet instructs to get your crop up and ready to harvest before the shade overtakes the garden spot in the spring.

I always thought you had to have your garden in full sun pretty much all day to be able to grow vegetables.  This isn't the case.  If you can give them some sun or dappled shade, it will be a boost to yields and you can grow almost any vegetable.
Kitchen garden with flowers in front
Watch how the sun travels through your yard and don't forget about your front yard!  You can grow herbs and vegetables interspersed with flowers for a beautiful "flower" bed.  If you have an elevated deck that gets sun, use pots.  There are many varieties today bred specifically to be compact and do well in pots.   Decorative container gardening for edibles

Here is a listing of crops you can grow  in your garden by hours of sunlight:
2-3 hours of sun:  Anise hyssop, Asian greens, chives, cilantro, kale, lemon balm, lettuce, marjoram, mesclun greens, mint, mustard greens, oregano, parsley, scallions, shiso, spicebush, spinach, sweet woodruff, wild ginger
4 hours of sun:  Alpine strawberries, arugula, soybeans, tomatoes, cucumbers, eggplant, beans, peas, rosemary, basil, radishes, Swiss chard, carrots, beets
5 hours of sun:  blueberries, grapes, apple trees, micro greens, potatoes, celery, green onions, turnips

You can get more sun than you think by trimming tree limbs up to allow morning or evening sun in.  You can also use light colored mulch or even the high dollar metallic mulch to have more sunlight reflect up onto the plants.  Another approach would be to spray paint what the plants back up to with metallic paint or place a piece of metallic painted plywood behind your plants.

Another thing to keep in mind is when the leaves are off the trees.  There are many cool season crops that will do great in the chilly seasons like winter, spring and fall.  Overwintering crops are another winner for planting in the shade of late summer that will then have the benefit of late fall, winter and early spring sun.  For more on cool season crops for fall and winter, A fall edible garden and Winter edible garden.  For spring any that are planted before your first frost date are the cold hardy ones Spring edible garden  Indoor sowing/outdoor planting dates.

Crops that thrive in spring will appreciate shade and dappled shade during the heat of summer. These include lettuce, spinach, kale, chard, sprouting broccoli, and cilantro which bolt (go to flower) at the first sign of heat.  It is that bolting time of year.....  If you can plant them in a shady spot or move the pot they are planted in to shade as temperatures rise, you will be able to extend the season of harvest before they go to flower.

Don't let a little shade keep you from trying your hand at an edible garden!  The harvest may not be as much for the summer lovers like tomatoes, zucchini, cucumbers, peppers, and eggplant, but you can have a nice kitchen garden.

Saturday, July 5, 2025

July 2025 Edible Garden Planner

Late July harvest-peppers, squash, tomatoes, eggplant, cucumbers
Saturday, July 5, 2025

July is the time of year for harvesting the heat lovers like tomatoes, eggplant, zucchini, cucumbers, green beans, all types of peppers, basil and other Mediterranean herbs.  With the hot, dry weather here, watering and fertilizing are key to on-going harvests.  It is also the time to plant for fall harvests.

I got my summer garden in early May this year.  Our spring was back to being cool until June.  I did have to resow seeds of the heat lovers like cucumber, squash and beans in the garden.  Most of my summer vegetables I started indoors and transplanted when it got warmer.  Now, we are having a long string of 90's at the end of June and it is forecasted to remain above average for the next 15 days.  The peppers, eggplant, cucumber and squash are loving these temperatures and growing quickly.

Typically all my summer veggies are being harvested at this time-peppers, zucchini, eggplant, cucumbers, and green beans.  This year, I have harvested a few cucumbers, many tomatoes and both sweet and hot peppers.  The pole beans, zucchini and eggplant are way behind.  Only one eggplant is flowering so far.  There are lots and lots of baby tomatoes, many baby peppers, and husk cherries.  The butternut squash vine is really running and has several baby fruits on it.  I got my okra started late so it is still quite short and will be a while before it is flowering.  I put in 2 plants so I should get enough for the year even if they are running late.  They all love thrive in hot weather so should be producing within the month of July. 

By the end of the month, there should be more summer veggies than we can eat and we will start preserving the extra for winter and spring eating.  Preservation garden

For salads, Red Malabar spinach, New Zealand spinach, Perpetual Spinach, sprouting broccoli, Blue Feather lettuce, chard and orach are growing robustly and I have been harvesting from them for daily salads and sandwiches.  Red Malabar and New Zealand spinach greens love summer heat and humidity so are great substitutes for cool loving spinach.  Hilton Chinese mustard and Chijimisai greens are growing nicely and volunteer multi colored Chinese amaranth plant has sprouted in a pot.  All are tasty all summer in salads.  Growing summer salads

The spring lettuce has flowered and is producing seed.  When you see the white fuzzies on lettuce stalks, they are ready to save the seed.  I just pull the seed heads, break apart, put in a ziplock freezer bag, label with type and date, and store in the refrigerator.  I will re-seed my self watering pots with some of the seeds by cutting off the seed heads and placing in pots.  If I don't have time to gather the seed, I just let the seeds spread throughout the garden and move the volunteers to pots or garden spots that I want them.  Never ending salad from one packet of seeds  

It is best to start new lettuce seed every 3 weeks to keep yourself supplied for salads.  This time of year, do start the heat tolerant varieties.  Bolt-free, sweet summer lettuces  Next round will be the fall and winter varieties that have cold tolerance.  Succession planting is key for keeping lettuce in the heat of the summer.  Start your lettuce seeds in a cool spot as they won't sprout when the ground is above 75 F.  You can start them in a pot indoors and then take outside when they have sprouted.
Pole green beans on trellis
I have put the pole snap and lima beans in the garden bed this year.  I went to yard long beans for snap beans this year because they are so prolific in our climate.  My winged bean with its beautiful blue flowers I put in a pot so I can move it where I want it.  When snap beans start producing, harvest them daily to keep them producing.  I keep a quart bag in the freezer and add mature green beans as they are ready for picking.  Any storage beans like lima beans will stay on the vine until the pod dries.  Legumes-peas for spring, beans for summer

I had some garlic plants come up last year in a spot they used to be a couple of years ago.  I dug them and put them into the bed by the walkout basement where most of my edibles are at.  The plants now have garlic scapes and flowers so they are doing well.  Hopefully the cloves will be big enough to harvest this year.  Most of the shallots I planted last year did not survive, but the ones that did are flowering and expanding underground.  I have a couple of nice clumps so I hope to harvest some this year.  I just planted shallots I got from the grocery store so I wasn't sure if they would do well, but they have.

Garlic harvest time is typically this time of year.  When the tops start dying, it is time to harvest.  After pulling, be sure to harden off in a shaded area.  If your soil has alot of clay, you will have to dig them.  Try to not cut into the cloves when digging.  After two weeks hardening, the cloves can be brought indoors for storing.  Hardening is critical for the garlic to not rot when stored.  I love elephant garlic as the cloves are as their name suggests, they are huge!  Save the biggest cloves for replanting in the fall.  Garlic harvest time is near!  My favorite way to preserve garlic is to pickle them in apple cider vinegar with a few hot peppers and store in the frig.  Have garlic any time you need it, just pickle some!

The sweet onions I started from seeds and the sets I bought have not bulbed yet.  I planted some potato onions last fall.  They are multiplier onions that have a long storage life.  Of the 8 I planted, only 2 have survived.  I may have to wait another year for them to get established before I harvest from them.  My Egyptian Walking Onions are doing great.  I can use them for cooking and chives.  It would be nice to have some of the bigger bulbed onions for slicing for burgers.

I am growing Yukon Gold potatoes and sweet potatoes this year.  Yukon Gold is supposed to be a good storage potato and should be ready to harvest this month.  Sweet potatoes take until fall to produce their tubers.

Our basil has been doing great.  They love all the rain and heat we have been getting.  I can harvest as many leaves as I want for cooking.  They need to get a bit bigger before I will cut them back to make pesto.  The trick to keeping the plants from getting woody is to make sure to harvest down to the first few sets of leaves before the plants go in to full flower..  Keep pinching off the tops when you see flowers starting to form.  I leave several to go to flower as the bees love them and harvest from the rest.  I get two-three good harvests before fall.  I have switched to mainly Cardinal basil for harvesting as it doesn't get woody like Genovese basil.  I still grow Genovese basil because the seeds love the flowers.  Basil basics-harvesting, preserving, growing basil

Oregano, dill and thyme have been blooming for a bit.  Chives have not flowered yet.  The bees love these small herb flowers!  All can be cut and dried now, but I love the dainty flowers, too, and will wait until fall.  Make your own "Herbes de Provence"

I fertilized all the flowers and vegetables again to keep them growing a couple of weeks ago.  Pots lose nutrients at a much higher rate than garden beds so I supplement them with liquid fertilizer.  I am using a liquid fertilizer for all the potted plants about every other week and using a solid fertilizer monthly around each plant.  I like Espoma or ReVita since both are all natural products.  I use tomato fertilizer for all fruit producing plants and their general purpose vegetable fertilizer for all other veggie and herb plants.  If the plants need just nitrogen (leaves are yellowish and not dark green), I use blood meal, alfalfa meal or a liquid fish emulsion.  Decorative container gardening for edibles

I have been using a mineral supplement in spring for my plants for the last few years, both the garden bed, pots and the potting soil I make.  Right now I alternate between Azomite and kelp meal each year.  So many soils are low in minerals and micronutrients.  Your plants can't absorb what the soil does not have.  Kelp has growth hormones in it as well.  They can cause your plants to outgrow their pot.  If your plants get a big boost when you add minerals to the soil, you know that it was needed.  Adding minerals to the plants and soil will significantly increase the minerals in the plant itself, giving you minerals in the veggies you eat.  The next step in garden production and your nutrition-soil minerals

A key to keeping the garden productive this time of year is to keep even moisture to all the beds and containers.  Inconsistent moisture can cause tomato fruits to crack and blossom end rot.  Water the beds weekly and deeply if there hasn't been a good rain; they need a good inch of water a week.  During hot, dry periods, your containers may need watering every other day.  Self-watering pots with reservoirs in the bottom or very large catch pans are the trick to extending time between waterings.  Summer garden tips

If you are getting higher than normal rainfall, you'll need to fertilize more often as the rain can wash away the nutrients.  Keep an eye on the growth of your veggies and if they are not growing and producing as expected, they may need some extra food.  

Blackberries are ripening.  If you want wild blackberries, you have to get them quickly or the critters will beat you to it.  Do leave some for the wildlife.  My strawberries and raspberry vines are not flowering again yet.  They are both ever bearers so they will produce until frost.  Back yard strawberries 

Finally, there are many summer flowers in bloom.  The hollyhocks, daylilies, petunias, echinacea, carrots, fairy lilies, amaranth, zinnias, celosia, sunflowers, morning glory, mums, gladiolus, as well as many herbs are all in full bloom.  The hummingbird vine, sedum, jasmine vine will be blooming sometime this month.  The early spring mustard, carrots, lettuce and broccoli have all bolted and are flowering.  The bees just love their tiny flowers!  Flowers are not only beautiful, but attract pollinators making the garden more productive.  
A butterfly on zinnias in the edible garden
At the end of this month, it will be time to start your seeds and seedlings for fall and winter harvests.  You have to start early so they are at full size before frost.  Time to plant for fall and winter harvests! 

Pests and fungus can also be a problem during this time of year with the hot temperatures and high humidity.  I have been finding which vegetables aren't bothered by our heat and humidity and making these my standbys.  Trombetta squash is one that can be used as zucchini but doesn't overwhelm in production.  It's an heirloom variety from Italy.  In my garden, it resists powdering mildew and squash bugs unlike zucchini.  I tried a Warsaw spaghetti squash that was supposed to be disease resistant but it was overcome early in the season.  I didn't plant any spaghetti squash this year as I still have some in the freezer.  I'll try another variety next year that is resistant to squash bugs.    Preventing and treating powdery mildew

You can try and stay ahead of pests by monitoring the garden closely and picking off the pests.  If they do get the best of you, here are some natural ways to combat them.  Natural, organic pest strategies and how to make your own bug sprays    If you want to let pests come into natural balance, the rule of thumb is that it takes about 7 years for the "good" bugs and other "bad" bug predators like toads, birds, lizards, to take up residence in your garden to keep the "bad" bugs in check.

The cabbageworms still decimates my sprouting broccoli.  And the flea beetles chow down on my orach and amaranth.  I keep hoping this will be the year it comes into balance, but it has not happened yet.  I first tried to use BT sprays or dust that needs to be reapplied after a heavy dew or rain or inspect and squish daily, but those did not solve the problem over the long term and it was a lot of time to do religiously.  The cabbageworm starts in June.  If I harvested all my mustard, cauliflower and broccoli by the beginning of June, this would eliminate the problem.  I don't because sprouting broccoli leaves are ones that stay sweet all summer long so I use them in summer salads.  I have enough volunteers that there is always a plant to harvest from.  Maybe later this year, they will come in balance.

Monday, June 30, 2025

Top 10 Tomato Myths (And Some Truths)

Monday, June 30, 2025

Tomatoes are by far the most popular vegetable to grow in the United States. There is nothing like a tomato ripe from the vine! Many people started gardening by way of the tomato. They were the very first vegetable we grew at our house. Many gardeners have techniques they swear by to get the biggest and best tomatoes. 

Tomato Growing Myths (and Some Truths)
  1. Tomatoes love as much sun as possible! This depends on where you live. In very hot climates, 6-8 hours is plenty. Your tomatoes can actually scald in intense sun and heat. My Cherokee Purple tomatoes had many tomatoes scalded with the last heat wave we had.  For hot climates, plant your tomatoes in a north to south row so each side gets some shade each day.
  2. You should prune your tomatoes for the best harvests. This again depends on your climate. If you live in a hot climate with intense sun and heat, you want to keep the leaves to help protect the tomatoes from sun scald. If you live in a damp area, you want to prune the tomato plant to allow good air circulation and sunlight to help prevent disease.  Our climate is hot and humid.  I do limited pruning to ensure good air circulation.  Tomatoes 101, everything you need to know to grow great tomatoes
  3. Tomatoes love fertilizer! Actually, you only want to fertilize when you plant, again when the plant flowers and monthly after that. Too much nitrogen encourages leaf growth. Some that really sock the nitrogen fertilizer to the plant end up with a giant green plant with no tomatoes. To help with flowering, fruiting and blossom end rot, be sure to get a fertilizer with plenty of phosphorous and calcium or one specifically for tomatoes.  There are many fertilizers available just for tomatoes.    How to care for the summer edible garden
  4. Tomatoes can’t be grown in pots. Tomatoes can be grown in pots, but not the big tomato plants or you have to grow them in a very large container like a half whiskey barrel. Look for dwarf, pot, or patio types to plant in medium size pots. You will need to be prepared to water often.  Compact tomatoes for small spaces and pots
  5. Tomatoes need to be watered a lot. Actually, if you water your tomatoes a lot, you can end up with fungal diseases and mushy fruit. The trick with tomatoes is to keep their moisture even. Letting the ground crack and then drowning the plant will result in cracked fruit. In the hot times of the summer with no rain, you will likely need to water at least weekly for those in the ground and 2-3 times a week for those in pots. Be sure to not water the leaves, but the roots.  Quick tips on summer edible garden watering
  6. When you see leaves dropping, something is wrong. This is a natural progression of the plant. As fruits begin to form, there is less energy for the leaves and some leaves will turn yellow and die.
  7. A spindly tomato transplant is an unhealthy one. Actually the nodes on the stems can easily be transformed into roots. I take my transplants and remove the bottom leaves and plant deeply or on its side with only the top 4 leaves above ground. Roots will grow all along the stem buried in the soil.  This gives the plant a good root system.
  8. You can only transplant in early summer. Actually, if your tomato plants are starting to fade in mid summer, you can put out new transplants that will give you fruit until the first frost.  June is a great time to start new tomato plants.
  9. When you make sauce, the skins and seeds have to be removed. I put whole tomatoes into the food processor.  This saves so much time!  Some say that the skin and seeds can impart a bitter flavor. With the many types of tomatoes I have raised, this has never been a problem for me.  Preserving the tomato harvest
  10. Only paste tomatoes can be used for sauce. I use all my extra tomatoes for sauce. The best for sauce for me are the most prolific tomato plants. These have been smaller tomatoes and Cherokee Purple for us. I would ask your neighbors which ones give the most fruit if you are looking to put up by freezing or canning.  You may have to cook the sauce longer to get the thickness you want over all paste tomatoes.  I like to have one paste tomato in each quart bag that I freeze to give a silky texture to my soups and sauces.  Choosing which tomatoes to grow 
The last tip: Tomatoes are susceptible to fungal diseases. Do try to not plant your tomatoes in the same spot for at least 2 years and ideally four years. Fungal diseases stay in the soil and take a while to die out. The same goes for a pot. A way around it for a pot is to use new soil and disinfect the pot each year.  Also, do not water the foliage as this will encourage fungal diseases.  Practice crop rotation.  You can also use hybrids but they will not come back true to seed if you enjoy seed saving.  Crop rotation made easy for small gardens

Sunday, June 29, 2025

How to care for the summer edible garden

Potted eggplant and petunia
Sunday, June 29, 2025

The summer loving edibles from the tropics love this time of year.  My eggplant, cucumber and squash plants seem to be growing inches every day!  The crops from temperate regions like peppers, tomatoes, beans, and Mediterranean herbs are also growing quite well.  The humidity brings higher risk of disease and the lack of rain during peak summer heat can put a damper on garden production.  

To keep your plants thriving and your harvests at their peak all summer long, here are my top tips for summer edibles:
  1. Harvest frequently!  Plants are in the business of reproducing.  Their entire life is dedicated to giving the best possible chance of supplying more plants for the future.  The more you harvest, the more babies the plant will produce.  I have noticed that my cucumber plant can only support one or two large cucumbers on each vine.  As soon as I pick the big ones, you can see one of the small ones jump in size by the very next day!  Harvest in the morning for peak juiciness of fruits and in the afternoon for peak flavor of summer loving herbs.
  2. Mulch your beds. The mulch keeps the moisture from evaporating, allowing more infrequent watering.  It also moderates the temperature of the soil so it doesn’t get baking hot.  I use natural wood mulch in both my garden beds and pots.  Weed free, self fertilizing, till free garden beds
  3. Water consistently.  The cause of cracked fruits is inconsistent water.   The plant gets used to very little water and when deluged the fruit’s skin can’t expand fast enough and the fruit cracks.  Inconsistent watering can also cause blossom end rot.  Over watering can be a problem, too.  Too much water will cause your fruits to be tasteless and mushy or just rot and die.  If in the ground, your plants need either a good soaking rain each week or a deep watering (1" total per week).  I use soaker hoses in my mulched garden beds.  It is best to water in the morning to avoid jungle diseases; you also get maximum absorption (biggest bang for your water buck).  For pots, you will likely need to water 3 times per week during the height of summer heat.  I like pots with a water reservoir built in the bottom or I use very large catch pans.  
  4. Do not water the foliage of your nightshade plants!  They are very susceptible to fungal diseases and water on their leaves encourages fungal growth.  It is recommended to spray every 7-14 days for natural fungicides on all nightshade plants (tomatoes, potatoes, squash, watermelon, and cucumbers) when the risk for fungal disease starts.  In our Zone 7 garden,  late May is not too early to start preventative spraying.  A few natural fungicides I have used are Copper, Serenade and Southern Ag as a preventative.
  5. Fertilize monthly with side dressing of compost or slow release fertilizer.  It is also a good idea to add minerals to the soil annually.  You can purchase minerals just for gardening.  I like to rotate between Azomite and kelp meal.  If your plants have more minerals, their fruits will too!  The next step in garden production and your nutrition-soil minerals
  6. Pick insects off daily.  Keep a close eye on your plants to you can stop an infestation before it gets started.  If I do get an really bad infestation, I will use diacotomus earth (DE) or insecticidal soap.  It is organic and not a chemical.  Some people even eat DE!  DE works by scratching the exoskeleton of the insects which leads to dehydration and death.  Be careful, though, as it will kill good bugs too.  I use it very sparingly, only if desperate and keep it away from the flowers.  A few bugs don’t eat much :  )  Another option is the use of light covers to keep the bugs from your plants.  Natural, organic pest strategies and how to make your own bug sprays
  7. Keep any diseased leaves groomed from your plants and do not compost them.  Diseases can be killed if your compost pile is hot enough but if not at high enough temperature and duration, disease will survive composting.  I haven’t progressed far enough yet in my composting skills to trust I am getting the pile hot enough and I don’t want to spread diseases to all my plants.  I put any diseased leaves and plants in the trash.
  8. Compost.  For all the trimmings from the garden and the kitchen, start a compost pile or get an indoor composter.  I have both.  I have an indoor Naturemill electric composter in the garage and an outdoor tumbler for all the kitchen scraps.  Right now,  I am using the outdoor insulated stainless steel tumbler.  Troubleshooting your compost pile  
  9. Summer veggies can get tired by the end of the season or overcome with disease.  A strategy to make sure you have an abundant harvest all the way through fall is to plant a second round of the heavy producers like summer squash, tomatoes, and cucumbers.  End of June, beginning of July is a great time to get a second round of summer lovers going.  Keep the harvest going, do succession planting
  10. If you live an area with scorching heat and sun, even the summer lovers would benefit from some afternoon shade.  Tomato and pepper fruits can get sunburned, called sun scald.  Many eggplant varieties can get thick skins and a more bitter taste in intense heat and sun.  Even in our Zone 7 garden, I have experienced all these.  You can move potted plants or plant on the southeast side to get your veggies some afternoon shade.  I did try shade cloth one year, but the plants did not seem to thrive in our Zone 7 garden under shade cloth cover.

Sunday, June 22, 2025

Time to plant pumpkin seed!

Sunday, June 22, 2025

Now is the time to plant pumpkin seeds!  Pumpkins love the hot weather.
Pumpkins are part of the squash family.  Squash originated in Mexico.  There are cave drawings from 8000 to 6500 BC depicting squash and the oldest remains found are from 8750 BC.  Squash was grown extensively by Native Americans as part of the “Three Sisters”-squash, corn and beans.  These three support each other's growth.  Beans provide nitrogen to the corn and squash.  The corn provides the stalks for the beans to grow up on.  The sprawling squash vines crowd out any weeds.
  
Pumpkins love organic matter.  If you throw a few seeds in your compost pile, you will be rewarded with exuberant vines.
Plant squash when soil temperatures are 70F for optimal germination.  Usually end of May through beginning of June are the best time to plant pumpkin but our weather has been so cool that the pumpkin seeds didn't germinate.  I have resown them this last week.

Add a fertilizer rich in phosphorous a week after transplanting, when flowers first appear and again when fruits begin to form.  They love water, too.  If growing in a pot, keep well watered and don’t let dry out.
Don’t panic when the first blooms fall off without producing any fruits.  There are male and female flowers.  If yours falls off, it was likely a poor guy that withered without the love a gal.  There can also be some false starts with malformed fruits.  Don’t worry, the plant will put on more blooms and you will be on your way to baby pumpkins before you know it!  Each vine does not produce many fruits. It is typical to get 2-3 pumpkins off a single vine.

Pumpkins you typically leave on the vine until the vine dies and the fruit loses its sheen in the fall.   Then bring inside and store in a cool, not cold, dark place.


The two biggest pest problems are squash bugs (left) and squash vine borer (below left are eggs and right is the adult).  Inspect the plant for squash bugs.  You can wear gloves, pick them off and throw them in a bowl of soapy water.
Natural, organic pest strategies and how to make your own bug sprays

The squash vine borer is best thwarted by planting early or late.  They fly in mid-June.  If planting early, be sure to inspect regularly the stems for any eggs.  Scrap off any that you find.  When the eggs hatch, the catepillar will dig into the vine and eat its way through its length.  You will have a strong plant one day and a wilted on the next.  You can wrap the stem base as a preventative.  The good news is that your plant does get infested, you can replace with another one.  They grow quickly in warm temperatures and soils of summer.


The cucumber beetle can infect the plant with a bacterial disease called wilt or cucumber mosaic virus.  The cucumber beetles we get here look like yellow/green lady bugs (left).  There are also striped varieties (below).

Again, the gloves, pick and throw in soapy water technique works.  Or if you are not squeamish, you can just squish them.

In late summer in areas with high humidity, you can get powdery mildew.  This can be treated by spraying with baking soda, copper, fresh whey and other organic fungal sprays and soil drenches.  When watering be sure to not get the foliage wet and water in the morning so any extra is quickly evaporated.  

If you bought a heirloom or open pollinated variety from the store or farmers market, you can easily save the seed to grow next year's plants.  From your best plant with no disease, let one get large, remove from the vine and leave it out in the garden bed.  The inner flesh will deteriorate leaving the seeds.  Just scoop out the seeds, put in a plastic baggie, date and keep in the frig for next year.  You can also scoop out the seeds from the fruit right off the vine and leave the seeds indoors to dry on a paper towel or plate.  Seed saving-fun, easy and a cost saver

If there is a variety that you love the looks and/or taste of from the store or farmers market, save the seeds and grow some of your own next year!  If it is an heirloom, it will come back "true" to the parent.  If it is a hybrid, it may be a surprise squash.  Either way, it is fun to try.

Saturday, June 21, 2025

Everything you need to know to grow okra, in the garden or pot

Red Burgundy okra flower
Saturday, June 21, 2025

Growing okra in the garden is a Southern tradition.  Okra is easy to grown and looks pretty cool, too.  The flowers are reminiscent of hibiscus flowers.  It is a tropical perennial but grown as an annual in zones further north.  They love the heat and are doing great in our Zone 7 garden this year.  

There is much debate about the origins of okra.  Ethiopia, West Africa and Southeast Asia all claim ownership its origin.  Wherever it originated, it came through Egypt to Ethiopia to Arabia and on to the Mediterranean region as far back as the 1100's.  It came to the Americas in the 1600's, landing in North America in the early 1700's.  

Okra is a good source of manganese, magnesium, fiber and vitamins C, K, thiamin, B6 and folate. 

 My go-to okra variety is Red Burgundy.  They produce beautiful fruits, have lovely stems and flowers, don't get fibrous too quickly and grow well in my garden.  Okra will be ready to harvest typically in July.  Guess they are like tomatoes, can expect fruits around the 4th of July.  They will produce until frost.  One plant is enough for us for eating fresh and preserving for the winter.
Early July garden with okra and zinnias in the background, chard in the foreground
Growing Okra
For growing, my first attempt was starting mine from seed then transplanting after all danger of frost had passed, giving 2 feet between plants.  The plants did not survive for some reason.  We are having lots of rain and the temps are much cooler than normal.  So, I started directly in the garden at the end of May.  They sprouted and are growing quite well.  Seeds should be planted 1/2"-1" deep.  Keep soil moist until sprouted.  Ideal germination temperature is 75-90F.  Start indoors until it warms up outside.  This time of year, they can be started directly in the garden bed or in an outdoor pot.   

There are many different varieties to choose from.  I have planted the dwarf varieties in a pot and they are about 2-3' tall.  The regular types can grow to 6.5' tall.  Both have beautiful hibiscus type flowers.   Typically, plants are spaced 2' apart in the garden.

Plants are available at many big box stores or nurseries.  I fertilize with a natural fertilizer and Azomite for minerals when planting.  I then fertilize monthly.  You can buy natural fertilizer or make your own from just a few ingredients.  I either make my own or use Espoma, Dr. Earth or ReVita Pro.  Make your own fertilizer, it's all natural and inexpensive

Okra needs about an inch of water each week.  If you are not getting rain, be sure to do a deep watering each week.  If growing dwarf varieties in a pot without a water reservoir, you will likely need to water twice a week.  With a reservoir, weekly will likely be sufficient.  Summer garden tips
Baby red okras
So far I have not had any pest or disease issues with any variety in my garden, although aphids, stink bugs and corn earworms are known to like them and they can succumb to fusarium wilt.

Like all veggies, harvesting them keeps them producing more for you.  For okra, you want to harvest them when tender.  They get hard and fibrous quickly; so if in doubt, pick them.  I read to harvest them between 2-4" in length.  For the green podded variety, this may be correct.  On the red pods, I have harvesting pods that are 6" long and they are nice and tender.  Typically, you can pick 4-6 days after the flower dies and the pod emerges.  Use a knife or scissors to cut the stem of the pod.  Some okra plants have spines.  If yours does, wear gloves when handling them; the spines can cause irritation.
Dwarf okra plant in foreground
They are even tasty eating right off the plant raw.  To preserve them, I chop them into slices and put into freezer bags.

Okra is a key ingredient in gumbo.  It can also be used as a thickener in any recipe.  My favorite way to prepare then is to slice, salt, coat with olive oil and roast them in the oven.